Step-by-Step: How to Flatten Wood Slabs Perfectly Every Time
For any woodworker, there is nothing quite as exciting as finding a beautiful live-edge slab. However, that excitement can quickly turn to frustration when you realize the wood is twisted, cupped, or bowed. Learning how to flatten wood slabs perfectly is the foundational skill that separates amateur projects from professional-grade furniture. In this guide, we will walk you through the process using the industry-leading spetool xpert PRO to achieve a glass-smooth finish.
Table of Contents
- Preparation and Safety
- Setting Up Your Slab Flattening Mill
- Router Compatibility and Bits
- The Step-by-Step Flattening Process
- Managing Waste with a Dust Collection System
- Achieving Perfection
Preparation and Safety
Before you begin milling, ensure your workspace is level. Woodworking requires precision, and a stable base is non-negotiable. Wear appropriate PPE, including eye protection and hearing protection, as routers are high-decibel tools. Inspect your slab for any metal inclusions or loose bark that might fly off during the milling process.
Setting Up Your Slab Flattening Mill
The biggest hurdle for most novices is the complexity of equipment. The Spetool Xpert PRO Router Sled solves this with a modular build designed for a quick, hassle-free setup. Most of the router carriage and key components are pre-assembled right out of the box. You can go from unboxing to ready-to-mill in under 20 minutes by simply securing the rails and attaching the brushes. This Slab Flattening Mill handles slabs up to 38” x 38.2”, and its modular construction allows for unlimited length extension, making it perfect for everything from cutting boards to massive dining tables.
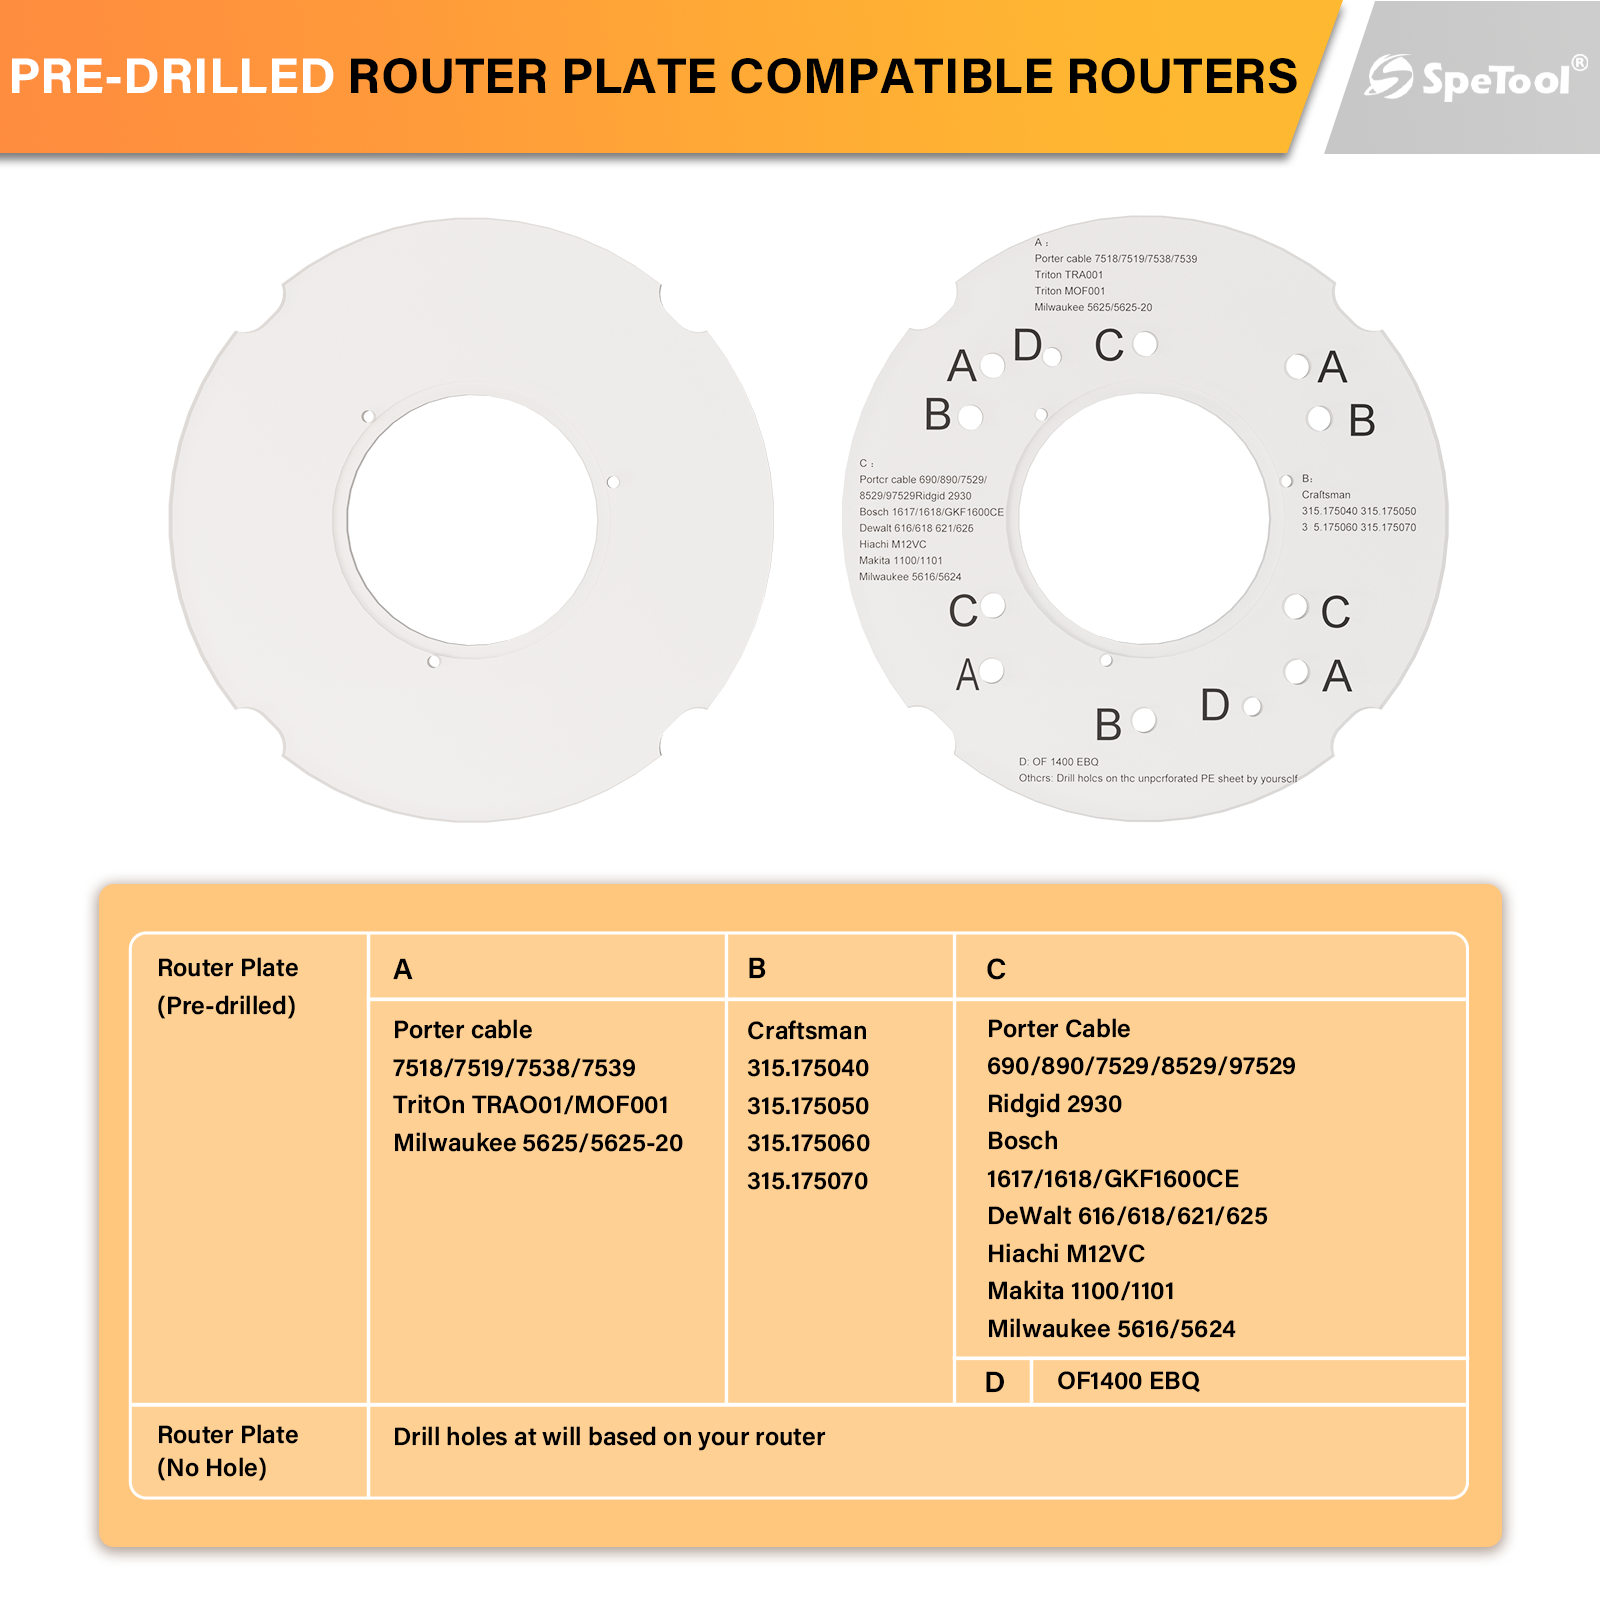
Router Compatibility and Bits
To flatten wood efficiently, you need a powerful plunge router. The spetool router sled is compatible with popular models like the DeWalt 618, Bosch 1617, and Festool OF 1400 EBQ. If you have a unique model, the kit includes a blank plate for custom drilling. Pair your router with a high-quality surfacing bit to ensure the cleanest possible cut.
The Step-by-Step Flattening Process
1. Secure the Slab
Place your slab on your workbench. Use shims to ensure the slab doesn't rock. Once it is stable, use hot glue or side clamps to keep it from shifting during the pass.
2. Find the High Point
Move your Router Sled for Flattening Slabs over the wood to find the highest point. This is where you will set your initial depth of cut.
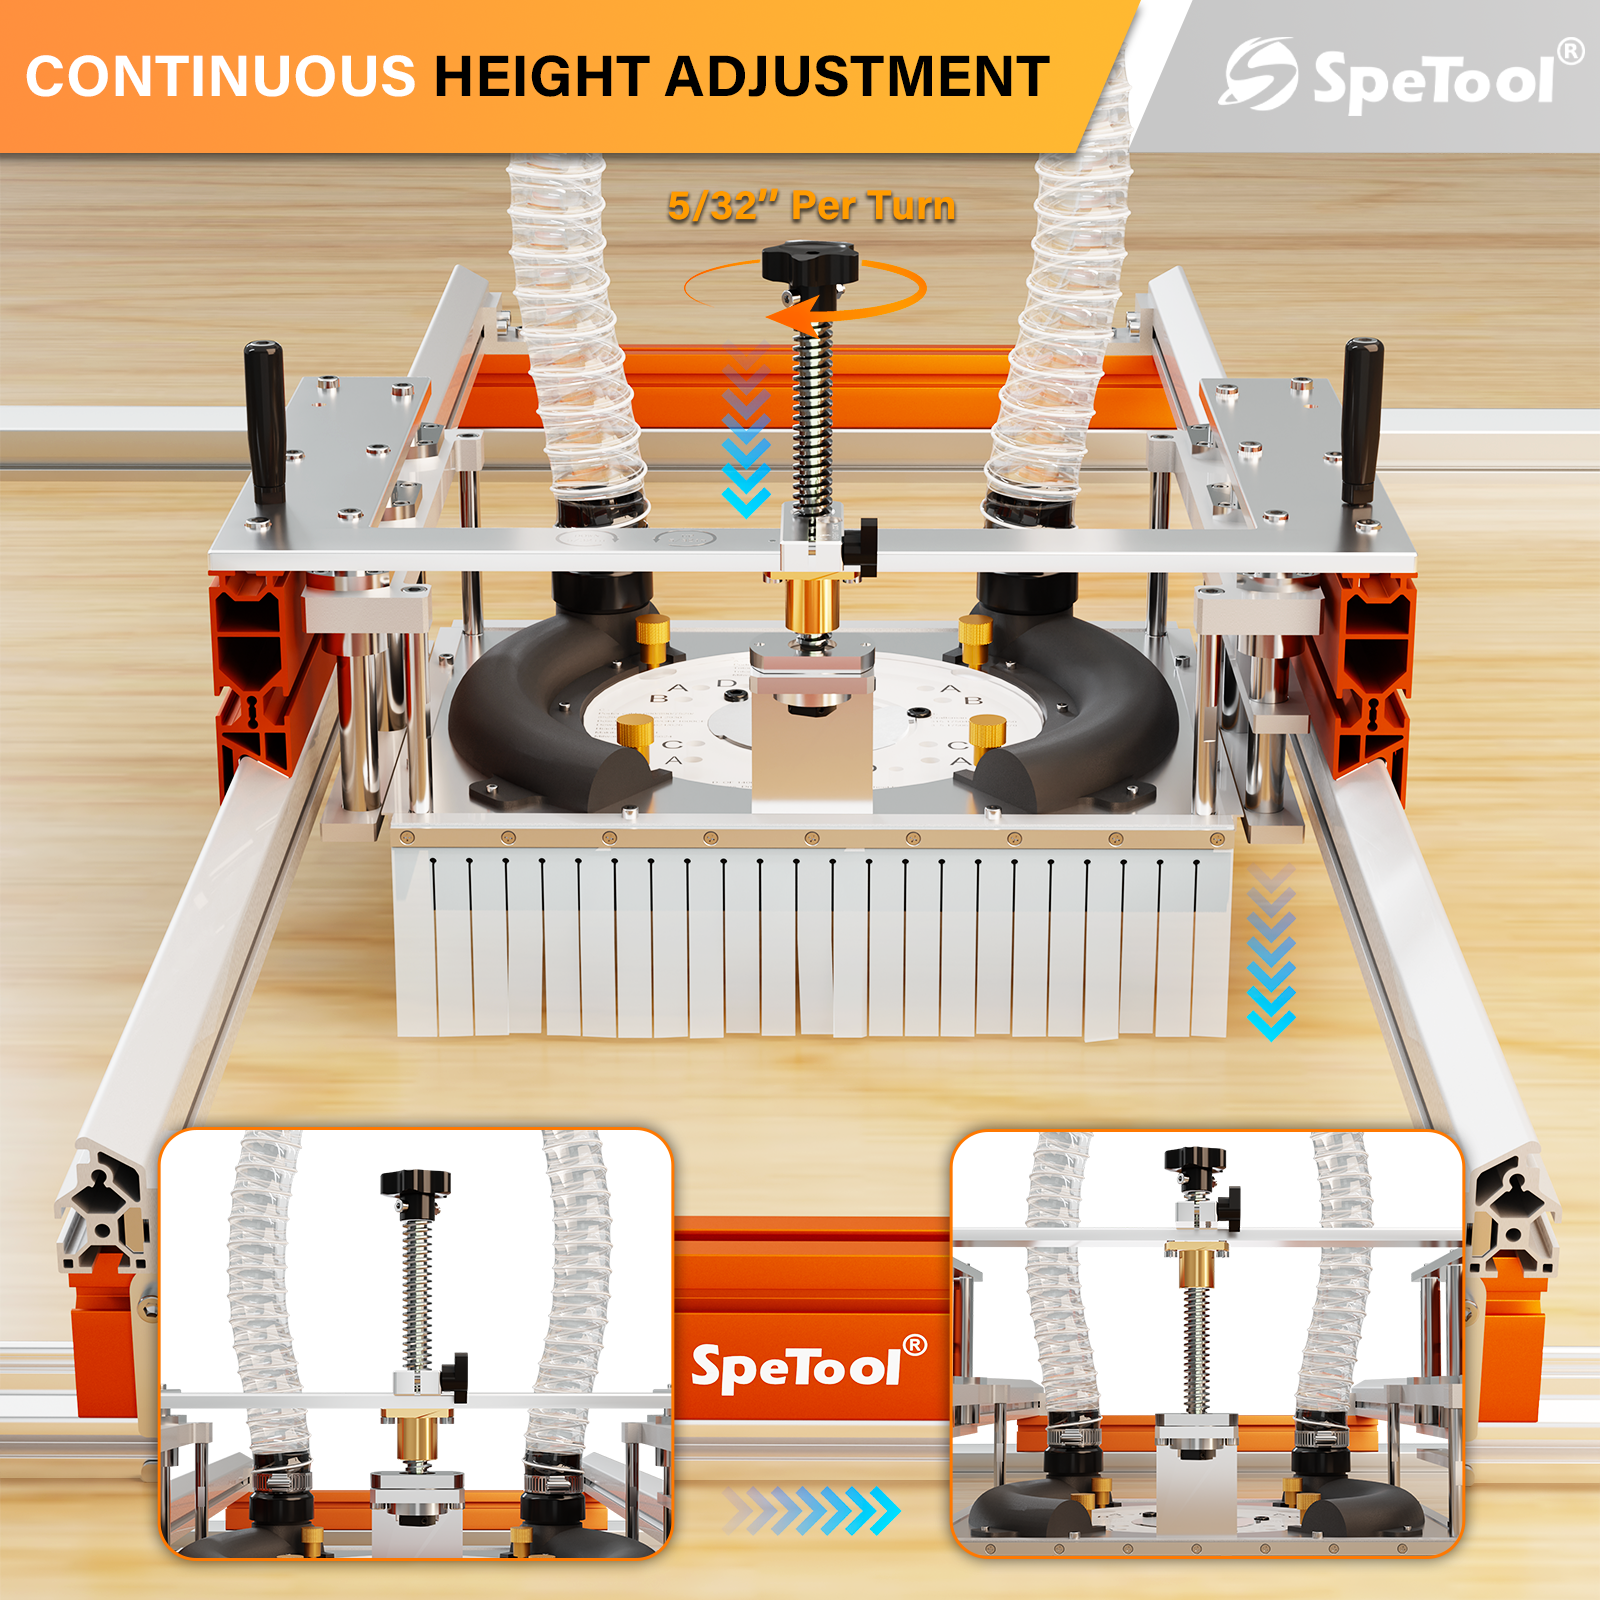
3. Precision Height Adjustment
This is where the spetool xpert PRO truly shines. Its upgraded height-adjustment mechanism features custom bearing housings that eliminate axial play. Each full turn of the adjustment knob delivers a precise 5/32” depth change. This allows you to creep up on the perfect thickness without taking off too much material, providing a range from 1/4” to 3-3/8".
4. Execute the Passes
Start your router and move the carriage across the X and Y axes. The durable aluminum rails resist deflection, ensuring the router remains perfectly parallel to the workbench. Overlap each pass by about 30% to avoid leaving ridges.
Managing Waste with a Dust Collection System
Flattening a slab produces a massive amount of wood chips. A dedicated Dust Collection System is essential. The Spetool system features dual dust ports and a full-surround brush that captures over 90% of debris. The added silicone curtain on the operator side prevents chips from blowing back at you, keeping your air cleaner and your focus on the wood. For more tips on shop cleanliness, refer to Popular Woodworking's shop guides.
Achieving Perfection
Once you have finished the first side, flip the slab and repeat the process. Because the first side is now perfectly flat, you won't need shims. The result will be a slab of uniform thickness, ready for sanding and finishing. By choosing a well-rounded tool like the Spetool Xpert PRO, you bridge the gap between hobbyist struggles and professional results. Ready to upgrade your workshop? Explore the Spetool Xpert PRO today.