Mastering the Glue-Up: A Step-by-Step Guide to Using SPEtools Panel Clamps
Achieving a perfectly flat table top or cutting board is the hallmark of professional woodworking. However, traditional bar clamps often apply pressure in only one direction, leading to bowing or misaligned joints. The spetool panel clamp solves this common frustration by applying pressure from all four sides simultaneously. In this guide, we will walk you through how to use this tool effectively to ensure your next project is flawless.
Table of Contents
- Understanding the 4-Way System
- Step-by-Step Setup Guide
- Pro Tips for Success
- Maintenance and Glue Removal
- Frequently Asked Questions
Understanding the 4-Way System
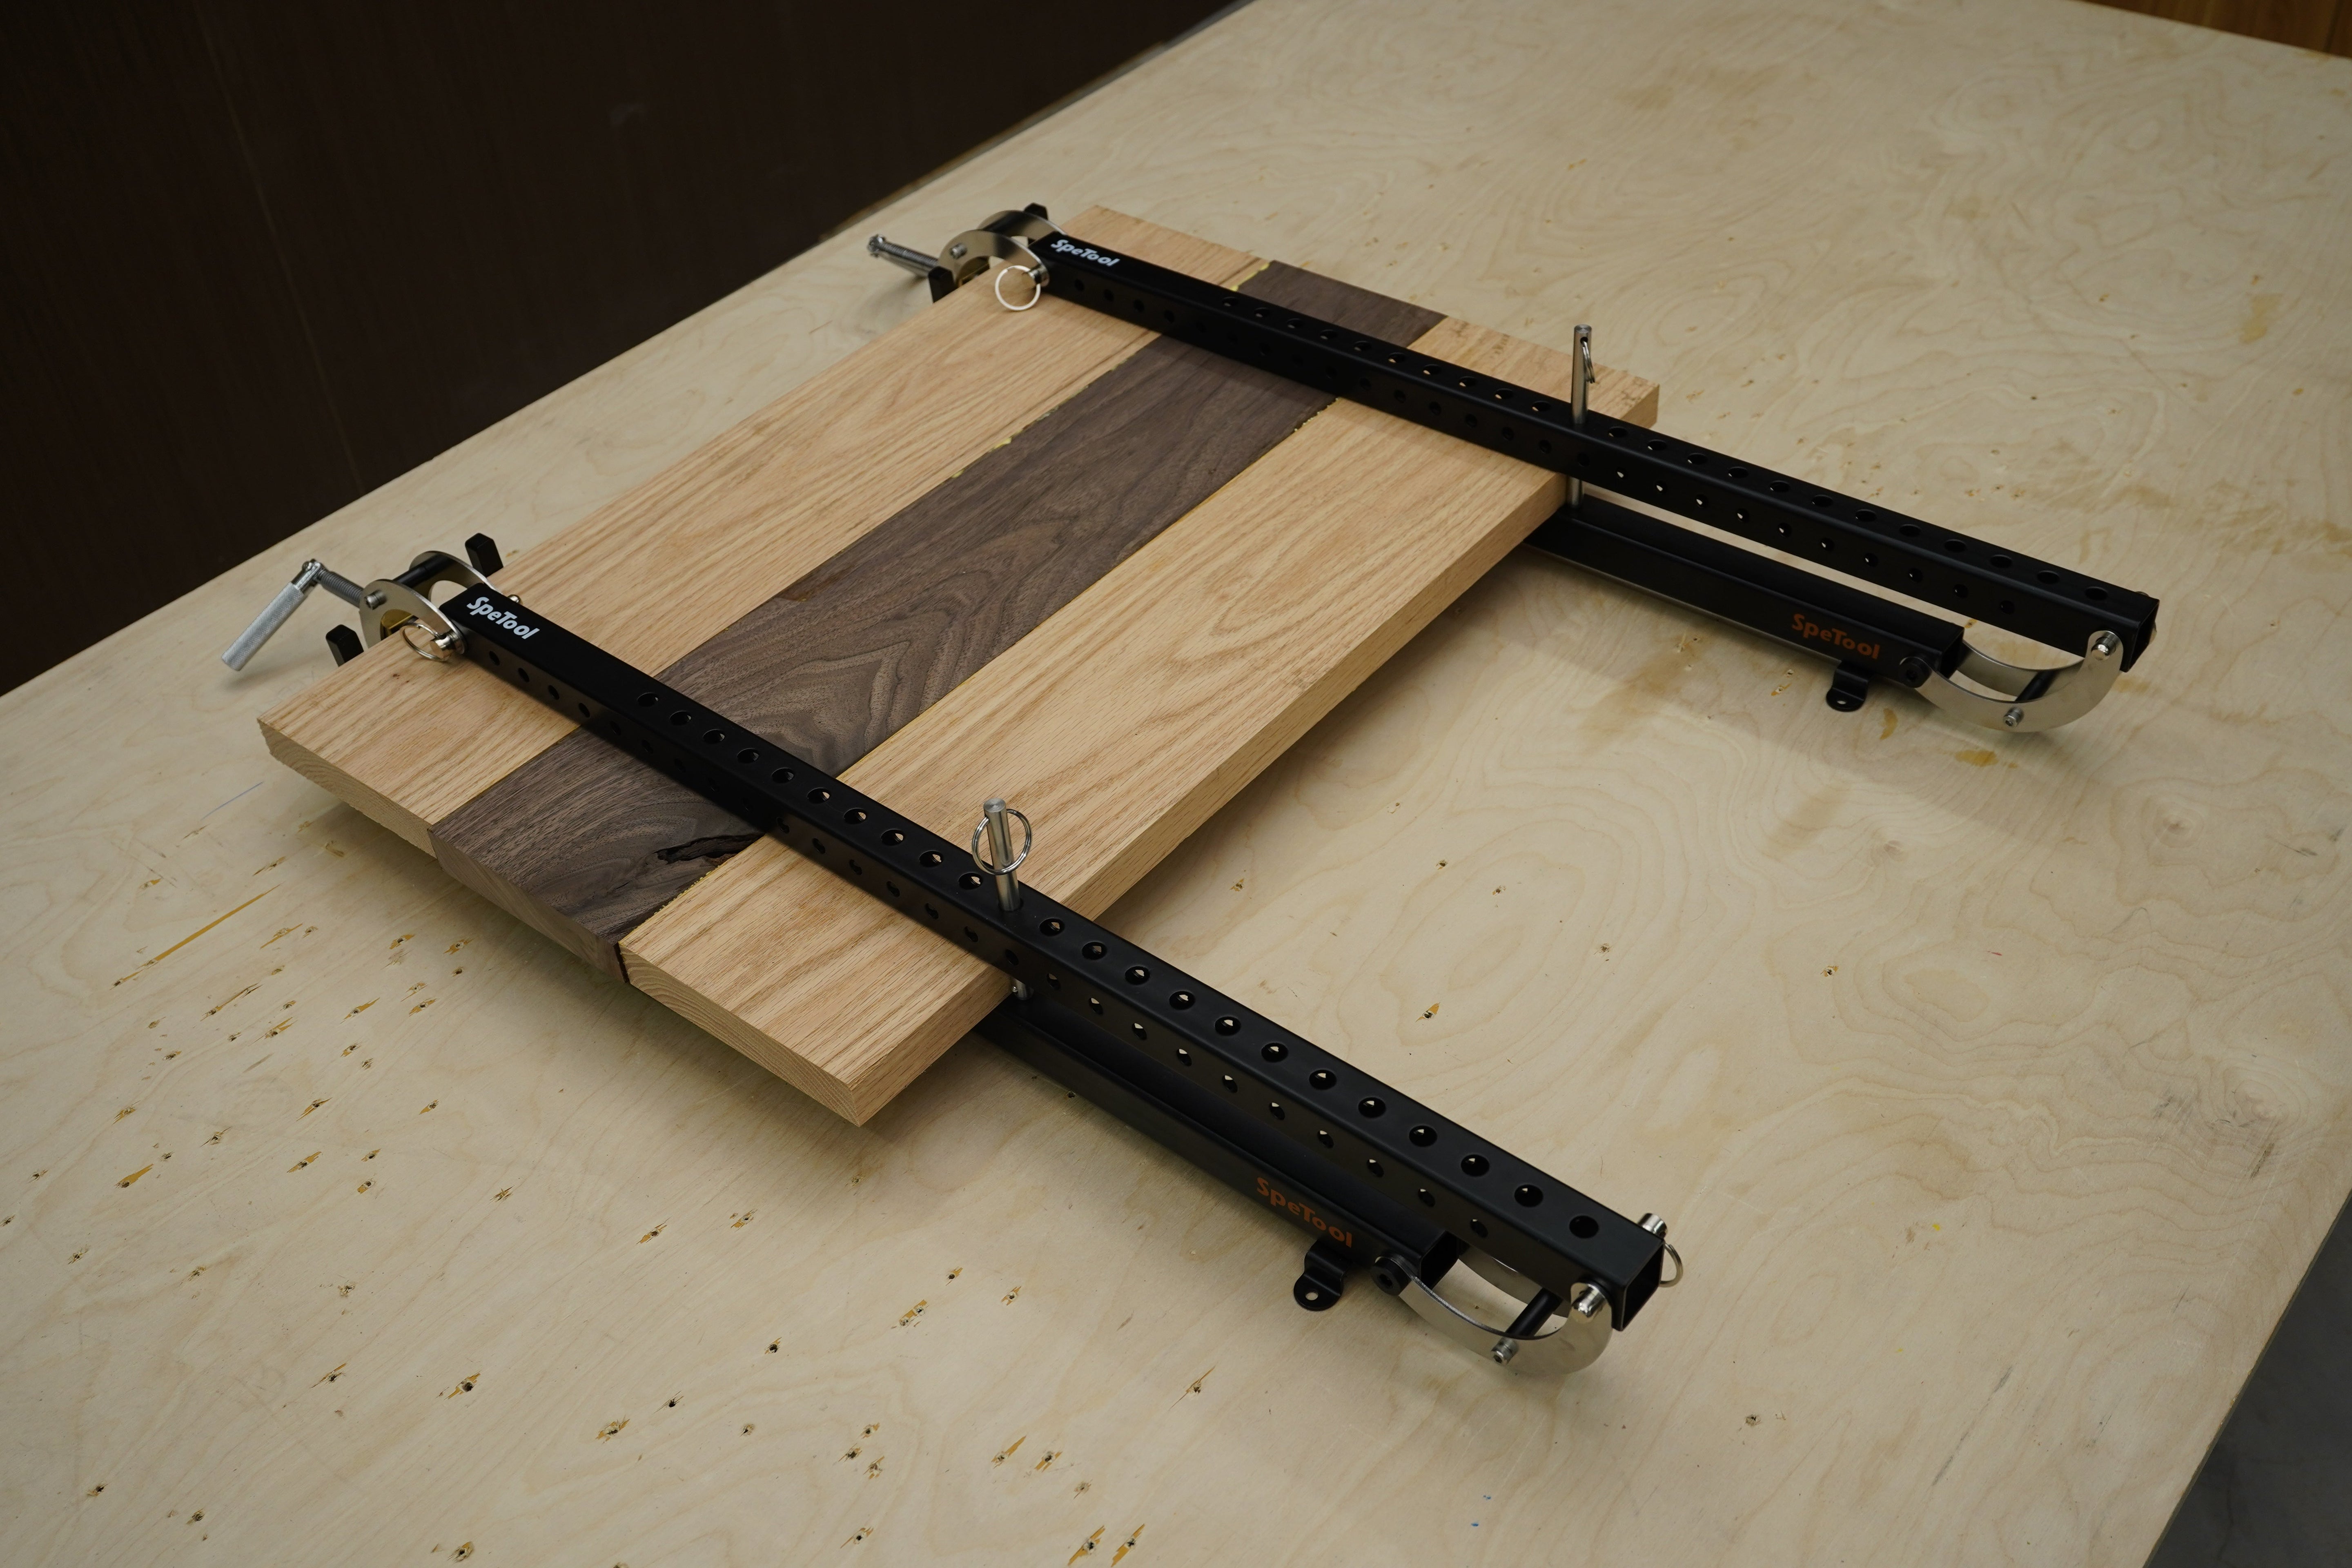
The SPEtools 4 way panel clamp is engineered with unique parallelogram-action couplers. Unlike standard woodworking clamps, these woodworking clamps 36 inch rails apply vertical pressure to keep the boards flat while simultaneously applying horizontal pressure to close the glue joints. This dual-action mechanism eliminates the need for cauls and prevents the 'buckling' effect often seen in wide panel glue-ups.
Step-by-Step Setup Guide
While the operation is intuitive, following the correct sequence is vital for a better experience. Here is how to set up your spetool panel clamp:
1. Prepare Your Stock
Ensure your lumber is jointed and square. The SPEtools system accommodates thicknesses from 1/4" to 3". Arrange your boards to match grain patterns before applying any adhesive.
2. Adjust the Rail Width
Position the tail stock using the fix pins. These pins allow you to quickly adjust the clamp to match the width of your panel, up to 36 inches. Ensure the pins are fully seated in the heavy-duty steel pipe holes.
3. Apply Glue and Position
Apply a thin, even layer of wood glue to your edges. Place the bottom rails of the 4 way panel clamp on your workbench, lay your boards across them, and then place the top rails directly above the bottom ones.
4. Engaging the Parallelogram Couplers
This is the most critical step. Slide the couplers into place. As you begin to turn the handle, the parallelogram action will begin to squeeze the top and bottom rails together while pushing the side pressure bars inward. This "wraps" the pressure around the wood.
5. Final Tightening
Tighten the screw handle until you see even glue squeeze-out. Because the spetool panel clamp is made of durable powder-coated steel with a copper thread bushing, the operation remains smooth even under high tension.
Pro Tips for Success
- Follow Instructions: Although the process is simple, always refer to the official SPEtools video instructions for visual alignment cues.
- Center Your Load: For the best results, try to center your panel within the 36-inch capacity to distribute pressure evenly.
- Don't Over-Tighten: The 4-way pressure is very efficient; you don't need to force the handle to get a perfect joint.
Maintenance and Glue Removal
One of the standout features of these woodworking clamps 36 inch is the special surface treatment. Wood glue does not stick well to the powder-coat finish. Once the glue has dried, you can easily remove any drips with a putty knife or even your fingernail, ensuring your tools stay in top shape for years of service in your woodworking shop.
Ready to upgrade your workshop? Explore the SPEtools 36-inch 4-Way Panel Clamp today and experience the ease of perfectly flush joints in every project.