
Introduction
Flattening a large, uneven wood slab that doesn’t fit in standard planers can be challenging for beginners. Using a router sled – a simple jig that lets a router slide across the slab – is an affordable and effective way to achieve a flat surface on wide boards or live-edge slabs.
In this beginner-friendly guide, we’ll walk you through each step of the slab-flattening process – from preparing your workspace and securing the slab, to making successive router passes and finishing the surface smooth. By the end, you’ll be able to confidently flatten wood slabs using a router sled, with clear instructions, helpful tips, and answers to common questions along the way.
Tools and Materials Needed
Before you begin, gather the necessary tools and materials:
-
Router with flattening bit: A powerful hand-held router (preferably a plunge router) fitted with a wide surfacing bit or flattening bit (special router bit for leveling surfaces).
🔗 Recommended: SpeTool W05003 ATS coated Surfacing Router Bit — ideal for smooth, controlled slab surfacing.

-
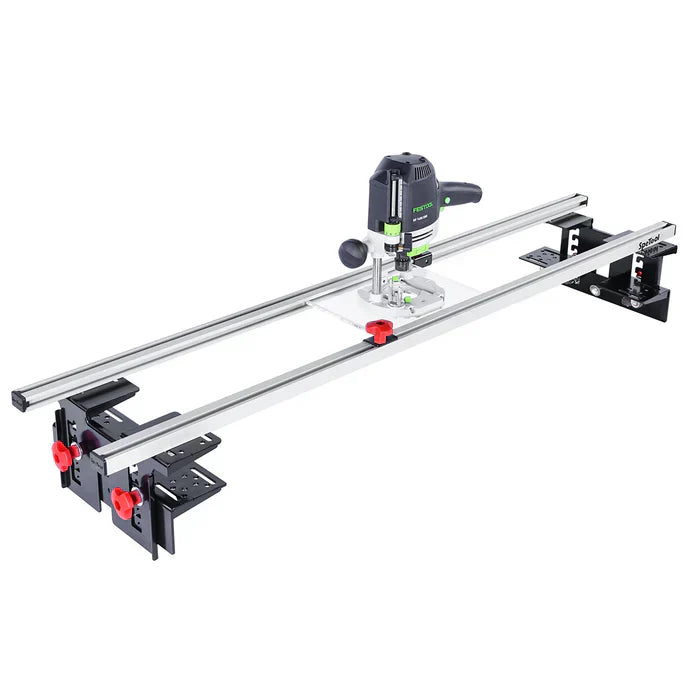
Router sled jig: A router sled (guide rails and a sled/carriage for the router) sized to accommodate your slab. You can use a store-bought flattening jig or a DIY sled made from straight rails.
🔗 Recommended: SpeTool Cratos S01001 Router Sled — makes it easy to flatten large wood slabs.

- Stable support platform: A sturdy workbench, table, or pair of sawhorses to support the slab. It should be larger than the slab and absolutely stable and level.
- Clamps and shims: Reliable woodworking clamps to hold the slab and rails in place, and small wedges or shims to stabilize and level the slab and rails as needed.
- Safety gear: Always have proper eye and ear protection, and a dust mask or respirator. Flattening slabs with a router produces a lot of wood chips and dust.
- Sandpaper or sander: Various grits of sandpaper (and an orbital sander if available) for smoothing the slab after routing.
With these tools on hand, you’re ready to begin flattening your slab.
Step 1: Prepare Your Workspace and Slab
Start by setting up a proper workspace. Choose a flat, level surface like a sturdy workbench or a set of sawhorses, and make sure it’s clear of clutter. Place your wood slab on this support.
Take time to stabilize the slab so it won’t rock or move during flattening. Use wedges or shims under any corners or high spots to prevent wobbling, ensuring the slab is as stable as possible. If the slab has a twist or bow, adjust with shims so that it’s roughly stable – you will be cutting the high points off anyway.
If possible, clamp the slab down to the work surface. You might use clamps on the edges or create blocking on the sides of the slab to keep it from sliding. Just ensure that any clamps or blocks are placed outside the area where the router sled will travel.
Before proceeding, remove any loose debris or bark from the top of the slab that could interfere with the router. It's also a good idea to mark any obvious high spots on the slab’s surface with a pencil – this will help you see your progress as you rout.
Finally, ensure your safety gear is on (eye protection, hearing protection, dust mask) before you start using the router in the next steps.
Step 2: Set Up the Router Sled and Bit
With the slab secure, next, set up your router sled. Position the guide rails of the sled on either side of the slab. The rails should be longer than your slab so the router can travel beyond the slab’s ends. Make sure the rails are parallel to each other and sit firmly. Use clamps to secure the rails in place so they do not shift.
Now, check that the rails are level with each other across the slab. Place a level or straightedge across both rails at several points. Shim under the rails as needed until they are perfectly co-planar (in the same flat plane). This step is crucial: if the rails aren’t level and parallel, your slab will end up uneven.
Mount your router into the sled’s router carriage (the platform that rides on the rails). Ensure the router can slide smoothly from one end of the slab to the other. Install the flattening bit in your router’s collet, tightening it securely.
Adjust the router bit height so that the bit just barely touches the highest point on the slab’s surface. To do this, move the router to about the middle of the slab and lower the bit until it meets the tallest spot on the wood. Starting at the highest point ensures you won’t take too deep a cut on the first pass.
Double-check everything: the slab is secure, rails are solid and level, router bit is tight and at proper height. Also, set your router to an appropriate speed (if adjustable, a moderate speed for a large surfacing bit, per manufacturer recommendation). Now you’re ready to start flattening.
Step 3: Begin Flattening – Make the First Pass
With your router sled set up, it’s time to make the first pass. Stand at one end of the slab and turn on the router. Hold the sled handles firmly and guide the router into the wood slowly.
Begin moving the router sled across the slab in a straight line. It’s usually best to go left to right (or right to left) in a steady motion. The router bit will start cutting any high spots it encounters. Keep the movement slow and consistent – don’t push too fast. Let the bit do the work, and avoid pausing in one place to prevent burn marks or divots.
When you reach the other end of the slab, you will have cut a strip of the surface. Now, shift the sled over slightly (overlap the previous cut path by about half the bit’s width) and make another parallel pass back across the slab. This overlapping ensures you don’t miss any spots and results in an even surface.
Continue this way across the entire slab for the first pass. Each pass will remove material from the high areas. After covering the whole surface, turn off the router.
After the first pass, the slab might look partially flattened: you will see freshly cut stripes on areas where the bit touched, and untouched low spots that are still rough. Don’t worry – this is normal for the first pass. Now you’re ready to remove more material with deeper passes.
Step 4: Repeat Passes, Lowering the Bit Gradually
Now that the highest points have been skimmed off, you can start taking deeper passes to flatten the slab fully. Raise the router sled back to the starting end of your slab. With the router OFF, lower the bit slightly – for example, drop it by about 1/16 to 1/8 inch (1.5–3 mm) deeper than the previous cut depth.
Restart the router and begin the next pass across the slab in the same manner as before, overlapping each row. This time, the bit will cut a bit deeper and hit more of the surface. You’ll remove more material on this pass. Again, work steadily and methodically.
Repeat this process of lowering the bit and making passes. Take multiple shallow passes rather than one deep cut – this is easier on your router and gives a smoother result. After each full pass over the slab, you can slightly lower the bit again and then rout the surface again.
As you go, periodically stop the router (once it’s out of the cut) and clear away the accumulated sawdust and shavings. A shop vacuum or just brushing out debris will help you see the surface clearly and prevent the sled from riding up on debris. Good dust collection not only keeps your workspace clean but also improves visibility and tool life.
Continue until the router bit has made contact with the entire surface of the slab. This may take a few passes, depending on how uneven the slab was and how much material needs to be removed. Be patient – slow, steady passes will yield the best result. You’ll know you’re done when each pass is cutting mostly air (meaning the surface is now uniformly flat and you’re barely removing any material).
Step 5: Check Flatness and (Optional) Flip the Slab
Once you believe the top surface is flat, turn off the router and examine the slab. Use a long straightedge to check across different areas of the slab. It should sit flat without gaps on the surface, confirming that all high spots are gone. You can also run your palm gently over the slab to feel for any remaining unevenness (be careful of any splinters).
If you discover a slight high spot left, you can restart the router and make a few targeted passes just over that area. In most cases, though, a thorough pass in Step 4 will have flattened the entire face.
At this stage, the top side of your slab should be flat. If your project requires both faces of the slab to be flat and parallel (for example, a tabletop needs a flat underside too), you will now flip the slab to flatten the other side:
- Remove the router sled rails temporarily and carefully lift or flip the slab over. Get a friend to help if it’s heavy.
- Place the slab back on the support, flat side down. Make sure there’s padding or clean supports so you don’t dent the freshly flattened surface.
- Re-set your sled rails and router as you did before. You may need to adjust shims under the slab now that the bottom is flat – it should sit more evenly this time.
- Repeat the same flattening process on the second face of the slab until it is also flat. Usually, fewer passes are needed on the second side because the slab is already of uniform thickness from the first side.
Flattening the second side ensures your slab has consistent thickness and both surfaces are true. If your project only requires one face to be perfectly flat (for instance, if the slab will be fixed to a base or wall on the other side), you can skip flattening the bottom.
Step 6: Sand and Finish the Surface
After routing, the slab’s surface will be flat but probably a little rough with slight ridges between router passes. The final step is to smooth the surface with sanding and apply any desired finish.
Start sanding with a medium-grit sandpaper (for example, 80 or 120 grit) using an orbital sander or sanding block. Sand the entire surface evenly. This will remove the ridges and any router marks. Then progress to higher grits (180, 220, or higher) for a fine, smooth finish.
Take care to sand out any burn marks or tiny ridges completely. You can also lightly hand-sand edges or areas the sander can’t reach. After sanding, wipe the slab clean of dust to inspect the smoothness.
At this point, your slab should be perfectly flat and smooth to the touch – a huge transformation from when you started. If the slab is intended for a project (like a table), this is the time to apply your chosen finish (such as wood oil, polyurethane, epoxy, etc.), but that goes beyond the scope of flattening.
Finally, clean up your workspace and congratulate yourself on successfully flattening a wood slab with a router sled. It’s a rewarding process that opens up possibilities to use beautiful large slabs in your woodworking projects!
Conclusion
Flattening a slab with a router sled is an accessible technique for woodworkers, even as a beginner. By methodically preparing your slab, using a well-aligned sled setup, and taking multiple controlled passes, you can achieve a flat, smooth surface on slabs that would otherwise be impossible to plane with standard tools.
Remember to be patient and prioritize safety at every step. With practice, you'll get faster and more confident. Soon, tackling that live-edge coffee table or massive dining table top will be well within your reach. Happy woodworking!
🔧 Explore more tools: SpeTool’s Router Bit Collection for Wood Slabs
🧠 Learn more: Choosing the Best Router Bits for Different Slab Materials