Expert Tips for Clamping Wide Door Panels and Cabinet Tops
For kitchen remodelers and professional cabinet makers, the biggest challenge in constructing wide door panels or expansive cabinet tops is not the glue itself, but the physics of the clamp. Achieving perfectly flat panels without the dreaded 'bowing' or cupping requires more than just lateral pressure. In this guide, we will explore the best techniques for clamping wide door panels to ensure your large-scale cabinetry projects meet professional standards.
Table of Contents
- The Challenge of Wide Panel Glue-Ups
- Why 4-Way Clamping is a Game Changer
- Step-by-Step Guide to Clamping Wide Panels
- Managing Glue Squeeze-Out and Maintenance
- Conclusion
The Challenge of Wide Panel Glue-Ups
When you apply heavy pressure to the edges of a wide panel using traditional bar clamps or pipe clamps, the boards have a natural tendency to buckle or lift at the joints. This is especially true for items like wide door panels and thick bench tops. To counteract this, traditional woodworkers often use 'cauls' (curved pieces of wood) to apply downward pressure, but this adds significant complexity and setup time to the glue-up process. According to woodworking principles discussed on Wikipedia, maintaining alignment under pressure is the key to joint longevity.
Why 4-Way Clamping is a Game Changer
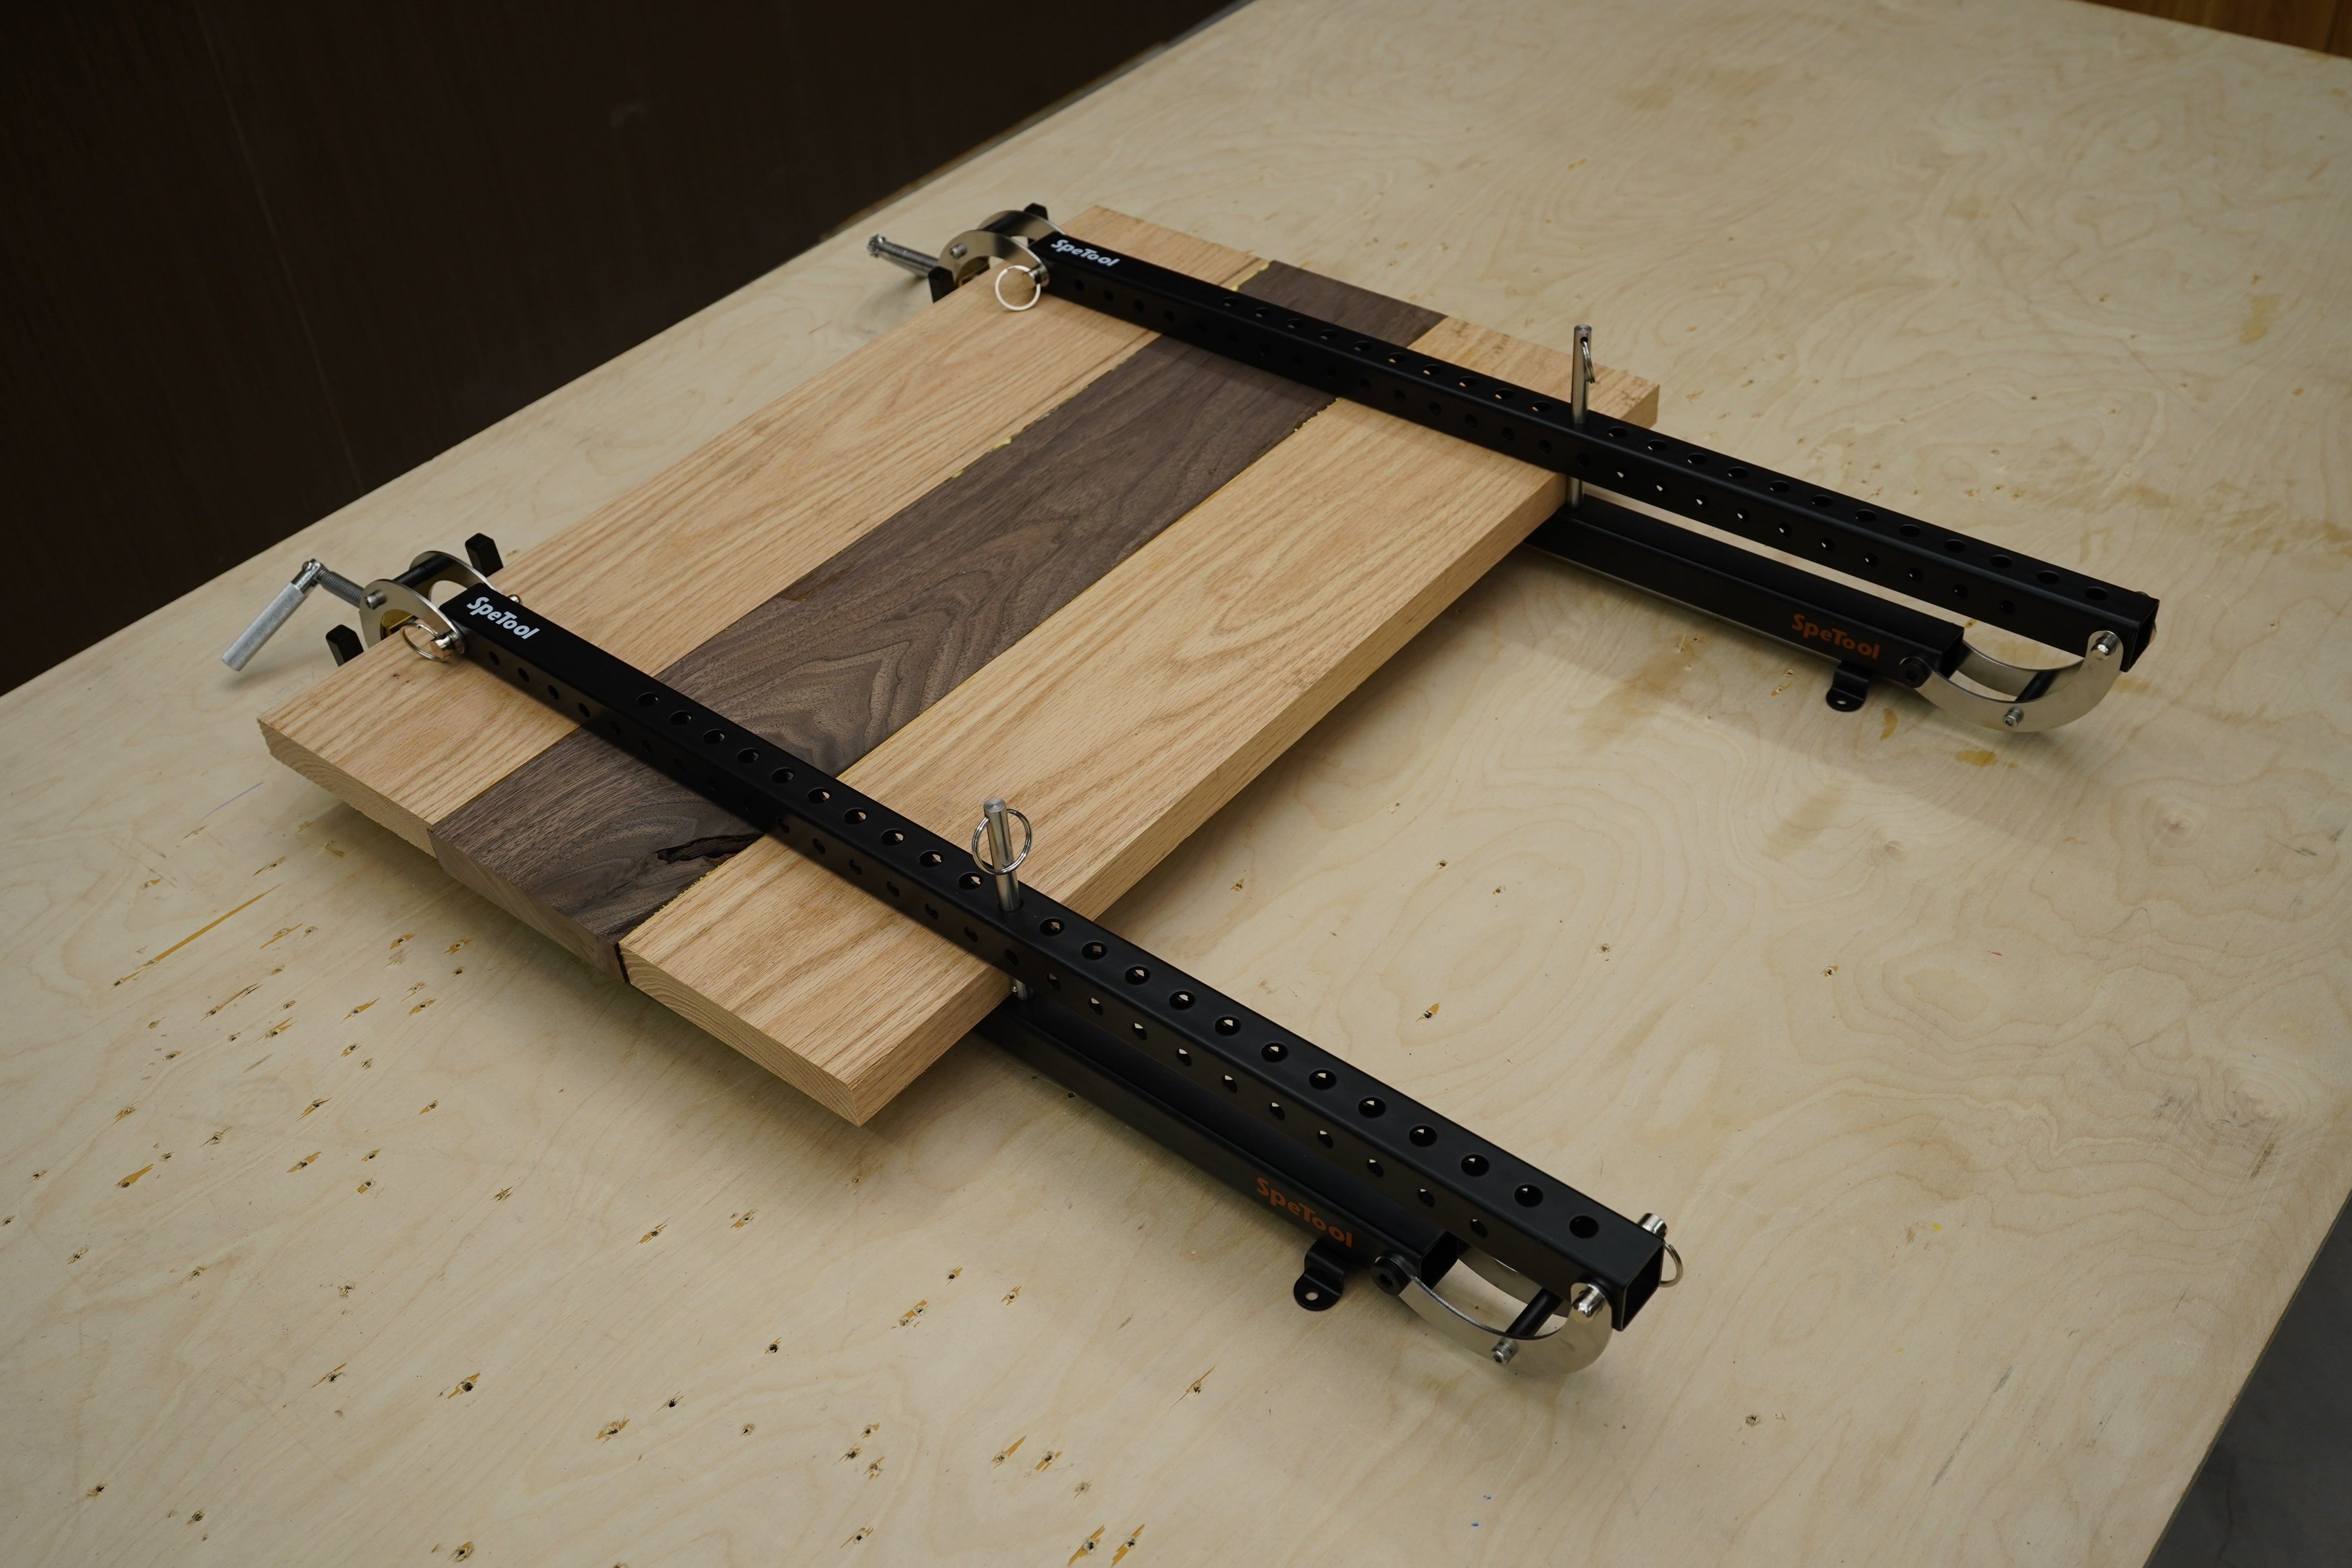
The solution to buckling is 4-way pressure. A 4 way panel clamp applies pressure not only from the sides to close the glue joint but also from the top and bottom simultaneously. This unique mechanism forces the boards to stay in a single plane, resulting in a flat surface that requires minimal sanding or planing afterward.
For these demanding tasks, the spetool panel clamp is an essential addition to any shop. Specifically designed with parallelogram-action couplers and fix pins, these woodworking clamps 36 inch allow you to adjust the width and thickness (from 1/4" to 3") easily. The 4-way pressure ensures that your wide door panels and cabinet tops stay flush, saving you hours of corrective labor.
Step-by-Step Guide to Clamping Wide Panels
To get the best results with your spetool panel clamp, follow these steps:
- Dry Fit First: Always arrange your boards without glue to check for gaps. Use the parallelogram couplers to set the appropriate width for your project.
- Grain Orientation: Alternate the direction of the growth rings (end grain) to minimize future warping, a standard practice recommended by Fine Woodworking.
- Apply Glue Evenly: Use a roller or brush to ensure 100% coverage on both mating surfaces.
- Set the Clamps: Place your panels into the 36-inch 4-way panel clamp. The parallelogram couplers will automatically apply downward pressure as you tighten the lateral screw, locking the boards into a flat configuration.
- Check for Flushness: Run your hand across the joints. With the 4-way system, the joints should feel flush immediately.
Managing Glue Squeeze-Out and Maintenance
One common concern in large glue-ups is the cleanup. The spetool panel clamp features heavy-duty steel pipes with a durable powder-coat finish. This special surface treatment is a lifesaver; glue that spills onto the clamp can be easily removed by hand or with a knife once it skins over, preventing damage to the fixture. This ensures your tool remains a reliable and precision instrument for years to come.
Conclusion
Investing in the right tools is the difference between a frustrating afternoon and a perfect project. For kitchen remodelers tackling wide door panels, cabinet tops, or cutting boards, the Spetool range offers the versatility and durability needed for high-stakes woodworking. By utilizing a 4-way pressure system, you ensure that every glue-up is flat, flush, and professional.