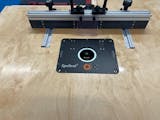
Making a heart-shaped box can be a fun and creative project. Here are the steps to make a heart-shaped box using Spetool 1/4 down cut, bowl bit, and bottom bearing compression flush trim bits:
Prepare the material: Choose a type of wood that is suitable for your project, such as maple, cherry, or pine. Cut the wood to the desired size and thickness.
Draw the heart shape: Draw a heart shape on the wood using a pencil and a template or by hand. Make sure the heart is symmetrical and the edges are smooth.
Cut out the heart shape: Set up your router with the Bow bit and 1/4 down cut bit. Start at one edge of the heart and make a series of overlapping cuts, gradually working your way around the heart shape. Keep the router steady and move it at a moderate pace to avoid burning or splintering the wood.
Sand the edges: Use sandpaper to smooth out any rough edges or surface imperfections on the heart shape. Start with a coarse grit sandpaper and work your way to a finer grit to achieve a smooth finish.
Make the bottom: Cut a separate piece of wood to the same size as the heart shape. Use the bottom bearing compression flush trim bit to trim the edges of the bottom piece to match the heart shape.
Assemble the box: Apply glue to the edges of the heart shape and place the bottom piece inside the heart shape. Use clamps to hold the pieces together while the glue dries.
Finish the box: Sand the surface of the box to remove any glue marks and to give it a smooth finish. Apply a finish of your choice, such as oil, varnish, or wax, to protect the wood and enhance its appearance.
Add a surprise: Finally, add a special touch to the inside of the box, such as chocolates, flowers, or a love note, to make it a special Valentine's Day gift.
I hope this helps! Good luck with your project!


