
Introduction:
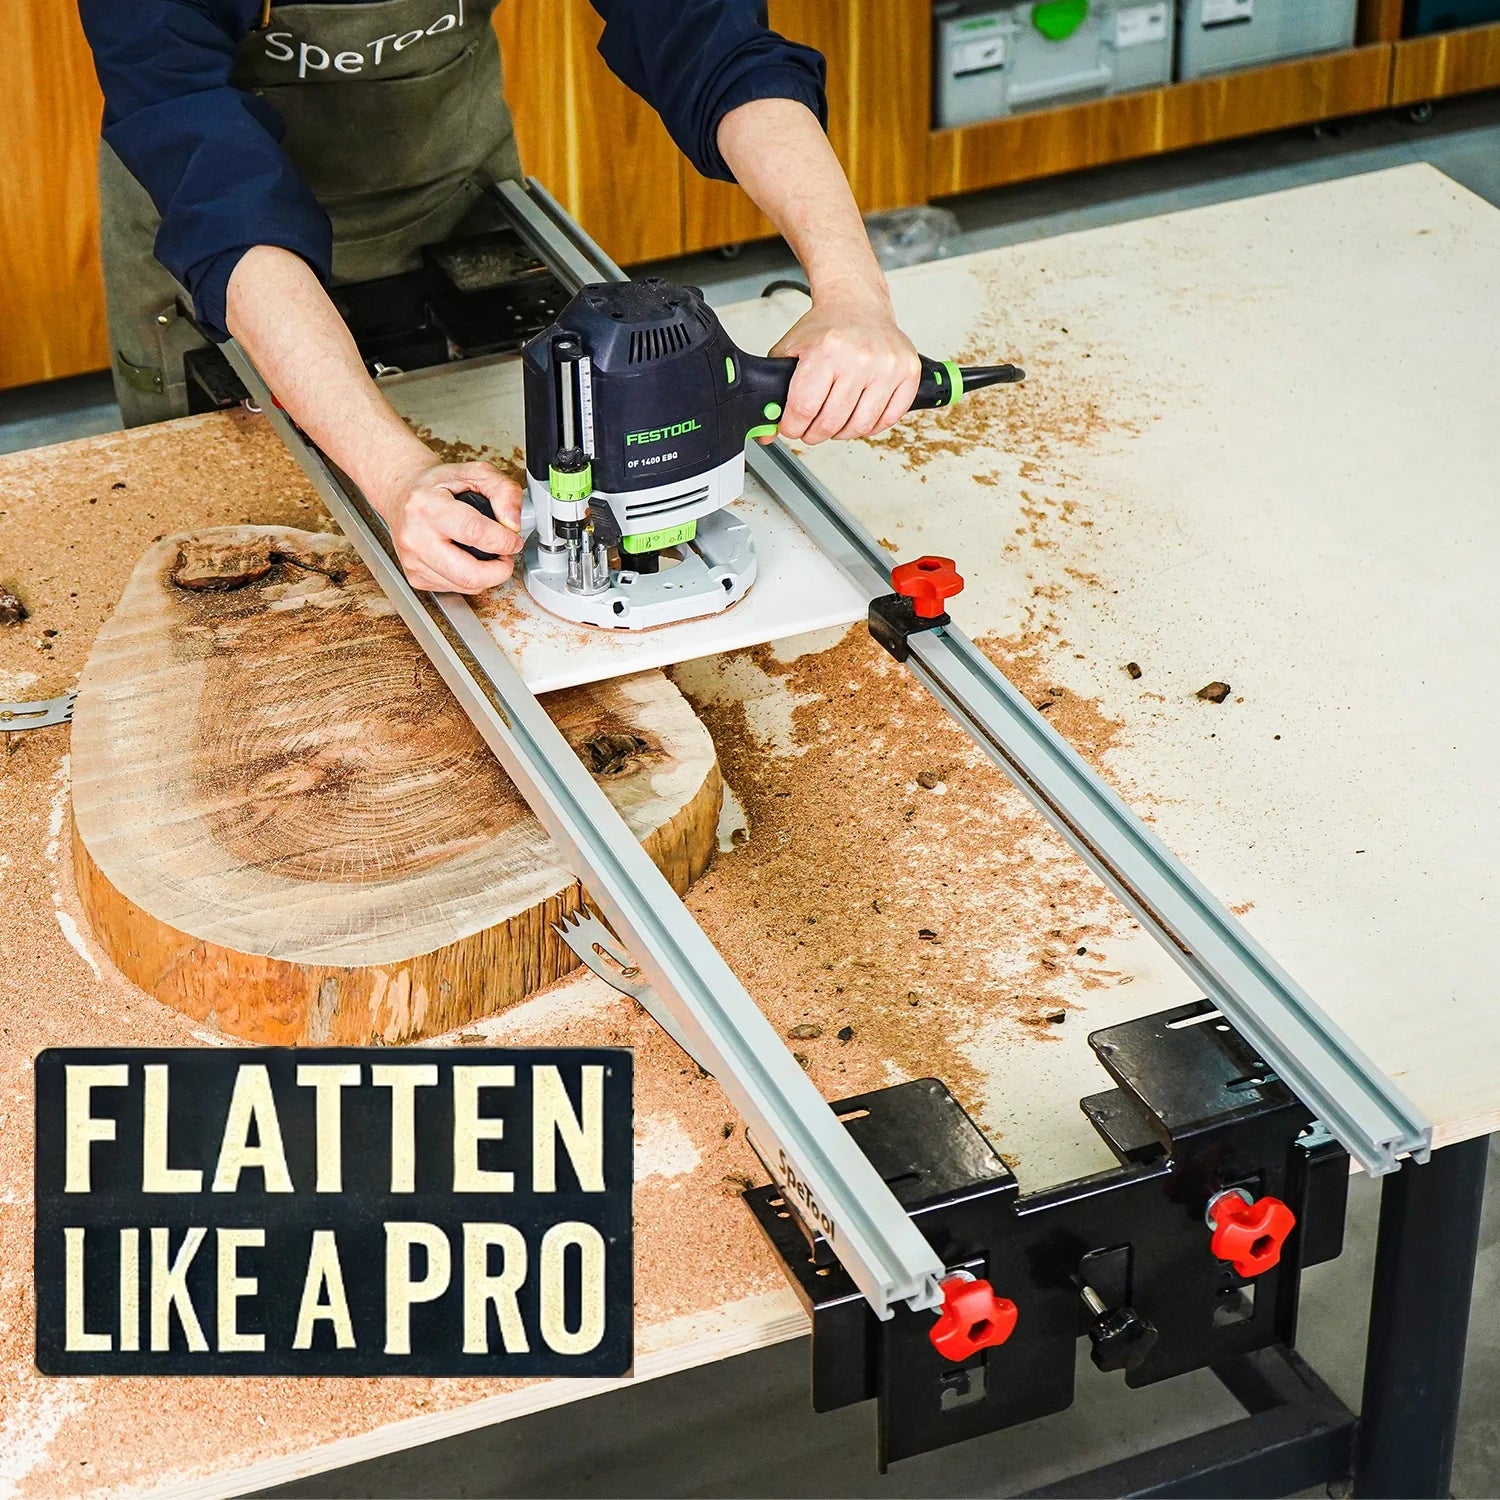
You’ve invested time and effort into flattening your slab with a router sled — but your work isn’t done yet. Achieving a truly stunning final result requires careful post-flattening preparation. From strategic sanding techniques to the perfect final finishes, here’s your complete guide to taking your slab from raw and rough to silky-smooth and showroom-ready.
Why Finishing Matters After Slab Flattening
-
Removes tool marks and minor surface imperfections
-
Enhances wood grain clarity and visual depth
-
Provides long-term surface protection against moisture and wear
-
Elevates your project to a professional level
Step 1: Inspect the Slab Surface
-
Highlight Surface Imperfections
-
Shine a raking light (flashlight at a low angle) across the surface.
-
Circle minor gouges, scratches, or router marks for targeted attention.
-
-
Check for Remaining High or Low Spots
-
Use a long straightedge across the slab.
-
If needed, make minor router passes or start sanding with aggressive grit.
-
Step 2: Begin Strategic Sanding
-
Start with Coarse Grits (60–80 Grit)
-
Focus on removing tool marks and smoothing out inconsistencies.
-
Use a random orbital sander or a track-mounted sander for larger slabs.
-
-
Progressively Increase Grit Levels
-
Move through 80 → 120 → 180 → 220 → (Optional: 320–400 for ultra-smooth finishes).
-
Wipe down the slab between grits to remove dust and prevent scratches.
-
-
Sand the Edges Carefully
-
Hand-sand live edges to preserve natural contours.
-
Avoid aggressive sanding that can alter the slab’s organic shape.
-
Step 3: Cleaning Between Sanding Stages
-
Vacuum Thoroughly
-
Use a shop vac with a brush attachment to clean dust between passes.
-
-
Tack Cloth Wipe-Down
-
Remove fine dust that could interfere with finishes.
-
-
Optional: Use Mineral Spirits
-
Lightly wipe with mineral spirits to preview how the grain will pop after finishing.
-
Step 4: Repair Minor Defects
-
Fill Micro Cracks or Pinholes
-
Use matching wood filler or epoxy resin for seamless repairs.
-
-
Spot Sand if Needed
-
Blend repairs into the surrounding surface before moving to final sanding stages.
-
Step 5: Choose Your Final Finish
| Finish Type | Best For | Pros | Cons |
|---|---|---|---|
| Oil Finishes (e.g., Danish Oil, Tung Oil) | Natural look, low-maintenance tables | Easy to apply, enhances grain depth | Requires reapplication over time |
| Hardwax Oils | High-traffic surfaces like dining tables | Durable, food-safe, matte to satin finishes | Longer drying times |
| Polyurethane (Water- or Oil-Based) | Maximum protection surfaces | Extremely tough, glossy or satin options | Can look "plastic" if over-applied |
| Epoxy Topcoats | River tables, resin-heavy slabs | Thick, glossy, waterproof | More complex application, bubbles risk |
Step 6: Applying Your Finish
-
Surface Preparation
-
Ensure the slab is completely dust-free.
-
-
Apply First Coat
-
Use lint-free cloths, foam brushes, or HVLP sprayers depending on finish type.
-
-
Allow Proper Dry Time
-
Follow the manufacturer's instructions carefully.
-
-
Light Sanding Between Coats
-
Use 320–400 grit lightly between coats to promote adhesion.
-
-
Final Coat Perfection
-
For maximum smoothness, do a final buffing with 0000 steel wool (for oil finishes) or polishing compounds (for hard topcoats).
-
Conclusion
Flattening a slab is only half the battle — the finishing process is where the magic truly happens. By following a thoughtful sanding progression, cleaning meticulously, repairing defects properly, and selecting the right finish for your needs, you’ll elevate your woodworking projects from good to truly exceptional. Invest the time in a perfect finish, and your slabs will not only look beautiful — they’ll stand the test of time.
Related Blog Topics:
Ready to transform your flattened slab into a masterpiece? Follow these expert finishing tips and let your hard work shine with professional-grade beauty and durability!