How to Flatten a Massive Live Edge Slab: The Ultimate Router Sled Guide
Working with massive live edge slabs is one of the most rewarding aspects of woodworking, but it presents a unique challenge: most of these pieces are far too wide for a standard thickness planer. To achieve a perfectly flat surface for dining tables or bar tops, the professional solution is a router sled.
Table of Contents
- Why Use a Router Sled for Planing?
- Essential Tools for the Job
- Setting Up Your Router Planer Sled
- Step-by-Step Flattening Process
- Maintenance and Tips
Why Use a Router Sled for Planing?
A wood router is versatile, but on its own, it cannot flatten a wide surface. A router sled for planing creates a rigid, level bridge over your workpiece, allowing the router to travel in a fixed plane across the X and Y axes. This setup eliminates cups, bows, and twists that occur naturally in large wood slabs.
Essential Tools for the Job
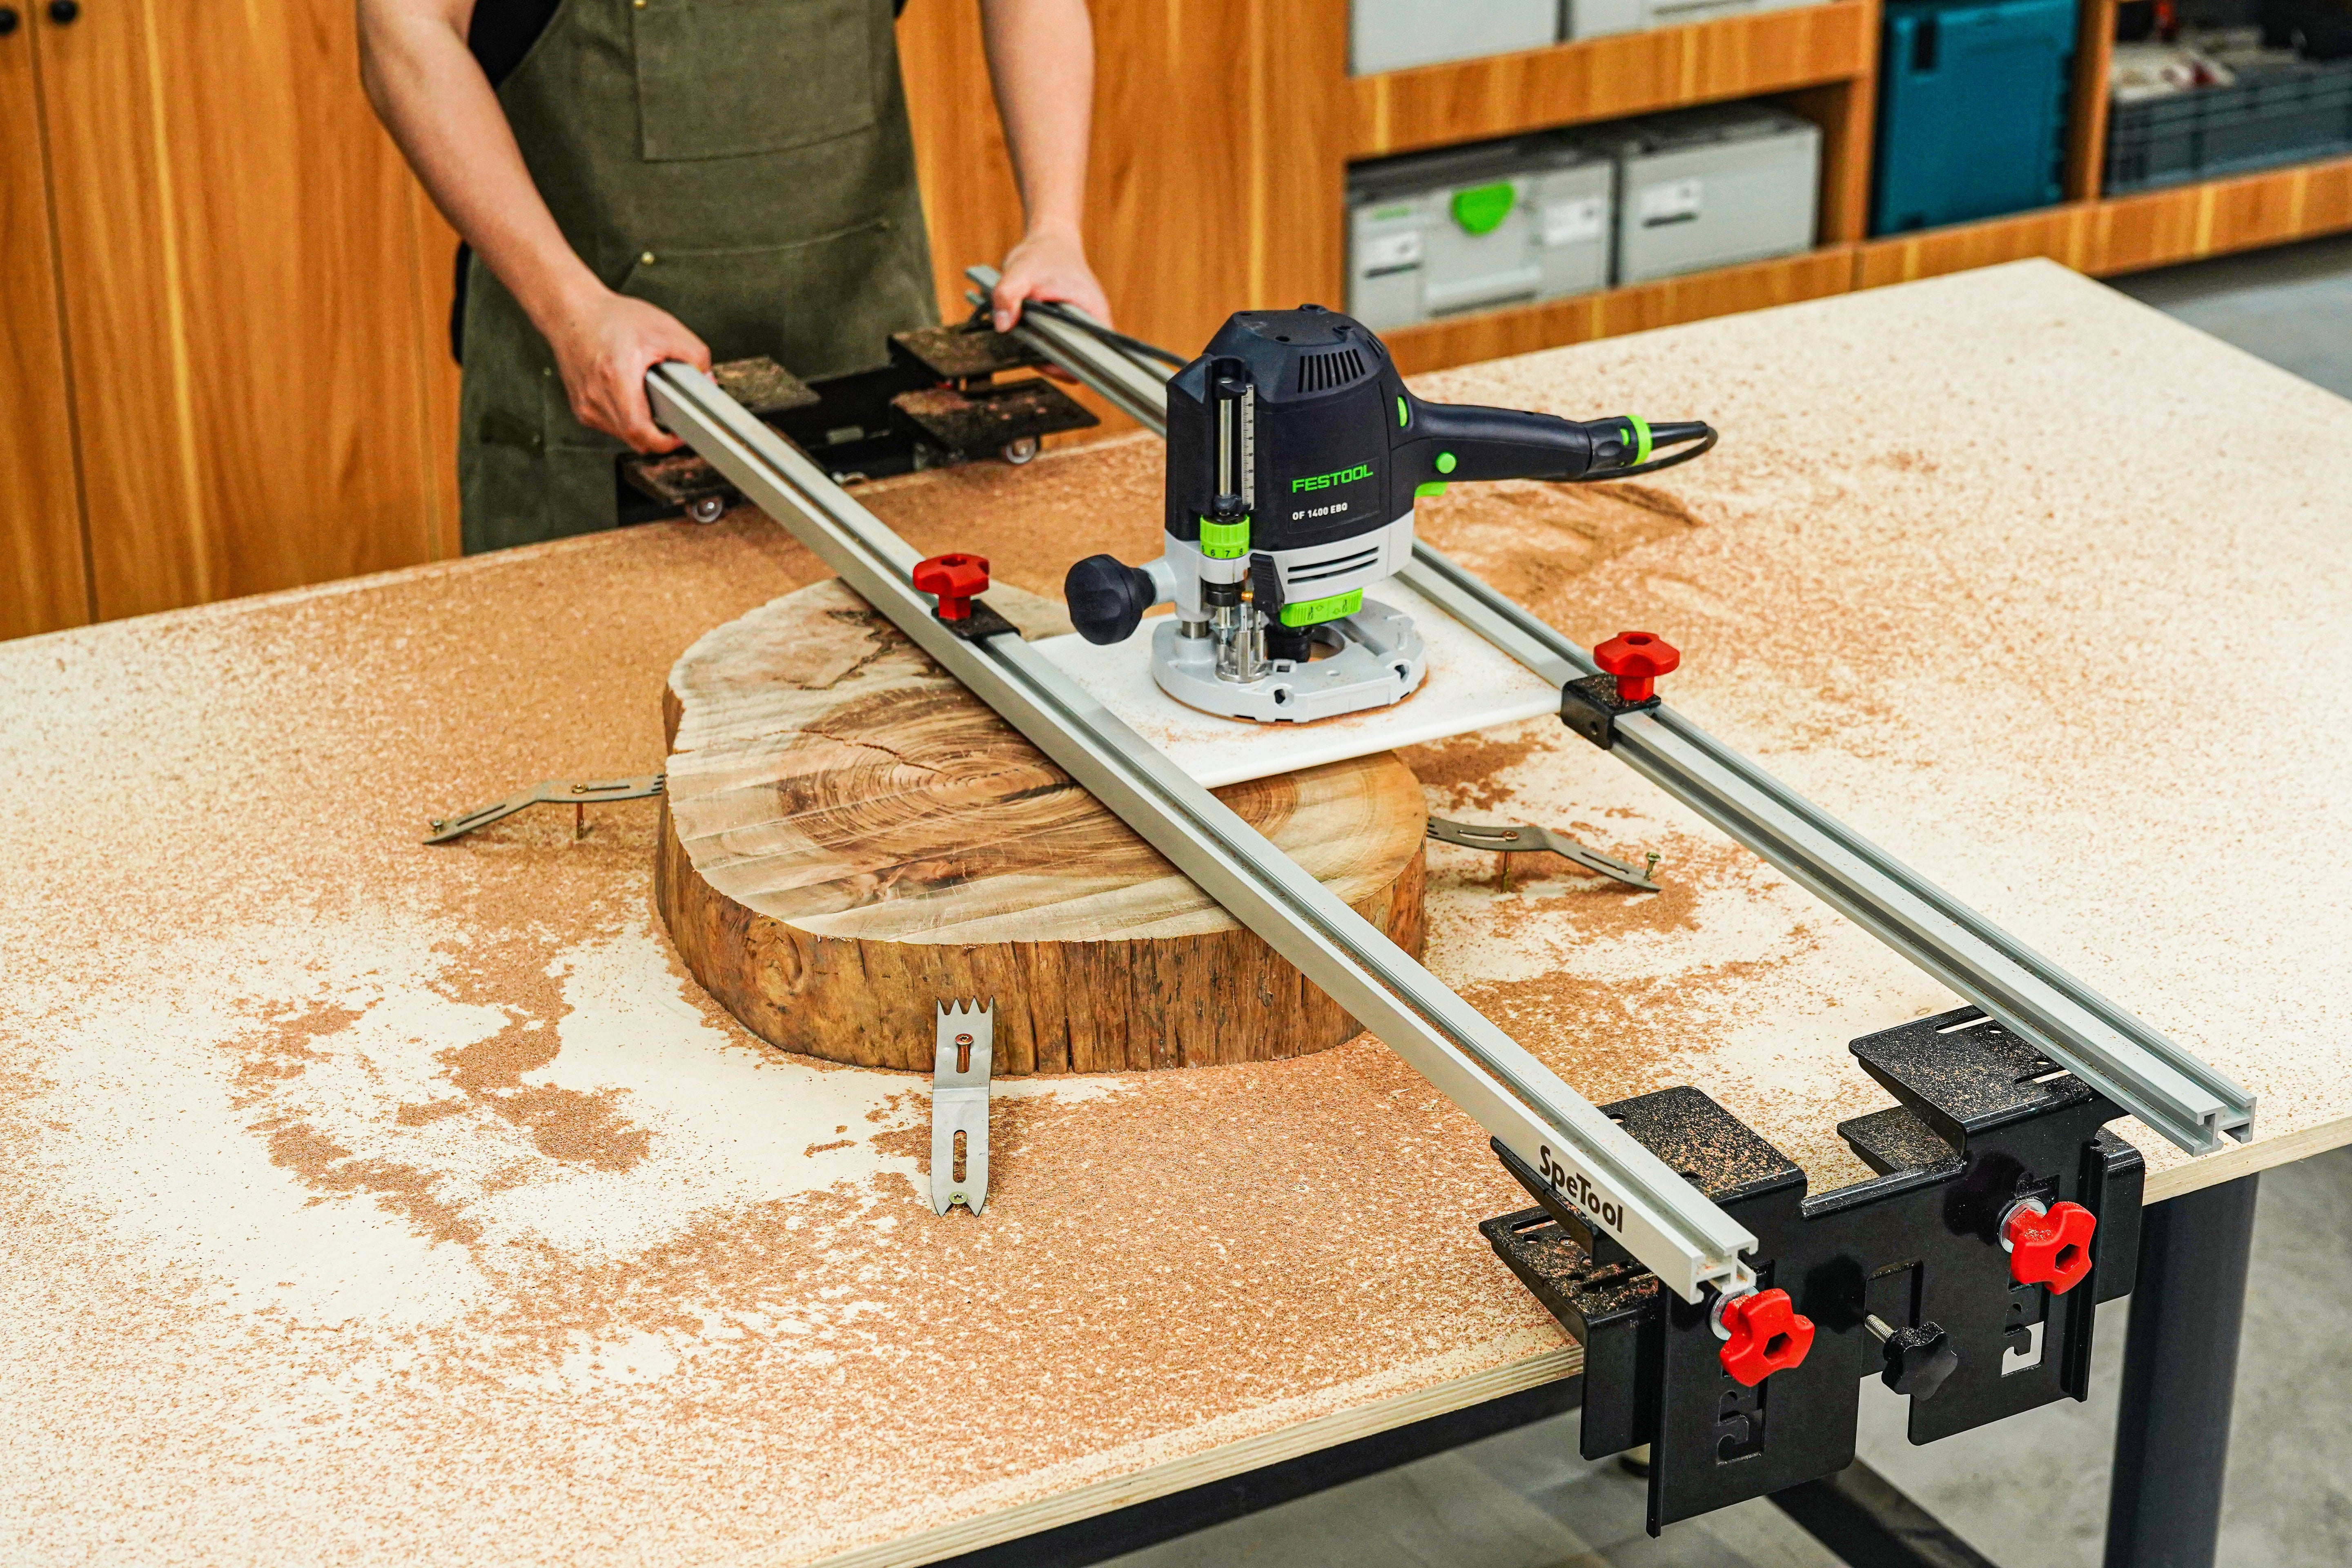
To get professional results, you need a setup that won't flex under the weight of a heavy-duty router. We recommend the SpeTool Cratos S01001 Router Sled. Unlike DIY wooden versions that can warp with humidity, the Cratos features rails made of 6061 high-strength anodized aluminum alloy, ensuring it will never bend or warp even after heavy use.
Key Features of a High-Precision Sled:
- Sturdy Rails: Aluminum alloy provides the rigidity needed for accuracy.
- Height Adjustment: Look for preset heights to avoid constant measuring.
- Dust Collection: Essential for indoor shops to manage the massive amount of waste.
Setting Up Your Router Planer Sled
Before you begin, ensure your workbench is perfectly level. Place your slab on the bench and use shims to stop any rocking. Once the slab is stable, assemble your router planer sled. The SpeTool Cratos makes this easy with an "Easy Slide-In" breach in the brackets, allowing your router to mount without complex disassembly.
If you find your flattening bit is too short to reach the slab, don't worry. You can utilize a Router Collet Chuck Extension. The Cratos system includes a laser pre-set position for the Z-axis, making it easy to adjust the height without the risk of the router slipping mid-pass.
Step-by-Step Flattening Process
1. Find the High Point
Move your sled across the entire slab to locate the highest point. Set your bit depth to take off about 1/16" to 1/8" from this high spot.
2. Initial Passes
Start the router and move the sled side-to-side (X-axis), then increment forward along the rails (Y-axis). The SpeTool Cratos lift bracket features 5 preset heights—no balancing needed; just click and go. This is particularly useful for thinner wood or projects requiring a lower profile.
3. Manage the Mess
Flattening creates a staggering amount of wood chips. This product can be used in conjunction with SpeTool dust collection (ASIN: B0D78YXTK8) to effectively capture 90% of wood chips, keeping your workspace clean and safe.
4. Flip and Repeat
Once the first side is flat, flip the slab over. Since the first side is now perfectly reference-flat against the table, the second side will result in a slab of uniform thickness.
Maintenance and Tips
Always ensure your bits are sharp. A dull bit will cause tear-out, especially on figured grain common in live edge pieces. For more specialized bits, check out the SpeTool CNC Router Bits collection for high-performance options. Remember that the Cratos package is all-inclusive, coming with clamping tools to fix your wood plate securely, so you can focus on the cut rather than the setup.