If you are a beginner in the woodworking industry and are unsure how to carve or go about it, then worry no more! This piece will enlighten you more on CNC woodwork carving.
Let’s get to it.
Choose your Favorite type of Wood Carving.
There are various types of wood carving, and they include chip carving, relief carving, whittling, and carving in the round. Before you start wood carving, it is essential that you first select your preferred style. It is imperative that you learn the finer details of the various types of wood carving.
Whittling is a conventional style of wood carving and entails the use of a whittling knife that is stiff-handled. The knife is used to make precise and angular strokes. The final workpiece is usually three-dimensional and small in size.
Relief carving is a craft that entails making carving figures on a flat piece of wood. Although the backside of the piece remains flat, the front side appears in 3D. This type of wood carving requires a vast array of hand tools.
Chip carving entails the use of chisels, knives, and hammers to create a masterpiece. This type of wood carving entails chipping away wood bit by bit to create a 3D pattern. The flat side of the workpiece remains flat.
Select the Ideal Wood Type
The appearance and the quality of your artwork are based on your ability to select the ideal type of wood for your project. You could opt to source your wood from a certified wood supplier or a craft store. If you are a beginner, some of the best woods to work with include butternut, basswood, and white pine. They are softwoods and thus much easy and convenient to work with.
Black walnut and Mahogany are also ideal for carving. However, they require some level of skills and expertise, and they are more challenging and challenging to carve. On the other hand, sugar maple, cherry, and white oaks are extremely challenging to cut due to their extreme level of hardness. However, they are ideal for creating durable and high-quality pieces.
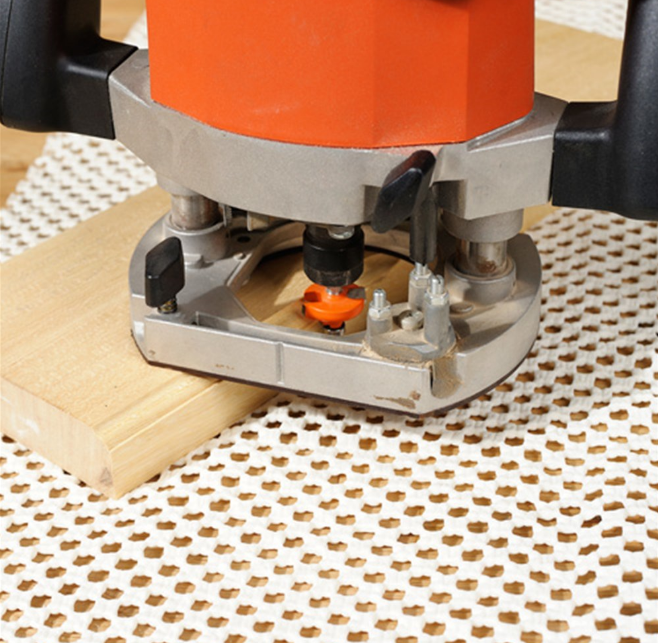
Buy the Ideal Chisels and Carving Knife
For an easy and swift carving process, to save on time to create a high-quality workpiece, you should ensure that you have the right tools, including the carving knife and chisels. You should ensure that you select a carving knife that is sharp, rigid, and easy to grip. You should avoid using retractable blades as they tend to be unsafe as they collapse under intense pressure.
It would be best if you opted for chip carving knives due to their outstanding performance. Their blades are approximately 1.5 inches. Additionally, their handles are lengthy and thus easy to work with. High carbon steel carving knives and chisels are highly recommended as they are durable and do not go blunt quickly.
Get the Various Gouges
Gouges are special tools that are used to scoop wood pieces as opposed to cutting them. They are curved to ensure that they easily carve, shape, and smoothen surfaces. There are various types of gouges, including bent and spoon gouges, v-gouges, and u-gouges.
U-gouges are made of curved cutting edges and curved shafts. When buying u-gouges, you should ensure that the cutting edges have varying widths and they range from 2mm to 60mm. The craft shape can either be bent, straight, spoon, or bank-bent.
Spoon and bent gouges are specialty wood carving tools that aids in the easy reaching of the hard-to-reach areas and spots of the wood for more refined carving. On the other hand, v-gouges are made of v-shaped angled tips. Their cutting edge ranges from 2 mm to 30 mm. The sides can converge at either 90 degrees or 60-degree angles.
Perfect your Carving Skills
To come up with a masterpiece and one that will attract potential clients, you need to perfect your carving skills. This can be achieved through continuous practice. Ideally, you could enroll in a college or a university offering woodworking and carving course; this way, you will broaden your knowledge and skills.
Before you start to carve your workpiece, you should try carving a scrap piece of wood. Practicing on a scrap piece will make you much confident when you finally start working on the actual piece. Practicing will also help you practice safe carving and avoid making mistakes that could lead to accidents.
To avoid accidents, you should always ensure that you use sharp cutting and carving tools, including carving knives and chisels. Ideally, you could consult a specialist who could help you to perfect your skills and expertise.
Correctly Hold the Carving Knives, Chisels, and Gouges
When carving and you need to push a knife, chisel, or gouge through the piece of wood, you should always ensure that you maintain your hands on the handle; your hands should not get in contact with the sharp cutting edges of the carving tools. Otherwise, you could end up injuring yourself badly.
To avoid accidents and for a swift carving experience, you should ensure that you correctly handle your cutting and carving tools. When using a chisel, you should hold steadily with your non-dominant hand and use your dominant hand to hit the chisel with a hammer or a mallet.
Make Carves along the Wood Grain
When carving, you should always ensure that you make cuts along your wood grain as opposed to making cuts against it. Carving against the wood grain usually makes the workpiece splinter. You should closely examine your wood to find the parallel and long lines that run through it. In some instances, the lines may not be straight but somewhat wavy.
Making carves along the wood grain also helps to improve the final outlook of your workpiece. It looks more elegant and classy, and thus the value of your workpiece will increase. You should also ensure that you make carves downwards towards the direction of grain lines. Ideally, you could diagonally cut across the grain.
Wear Safety Gears
Woodcarving can be hazardous as it entails the use of sharp cutting and carving tools. When not correctly handled, they could lead to accidents. It would help if you always put on safety gear, including gloves, goggles, and safety boots. This will help to ensure that you protect your eyes from flying pieces of wood. The gloves will help to protect your palms from cuts and injuries.
The safety boot is essential as it will protect your feet from injuries in case the workpiece falls on your feet. Additionally, you should always ensure that you work when sober and not under the influence of alcohol and drugs.
Make a Sketch of your Design
Before you start carving, you should first sketch your intended gouges and cuts. You could use a pencil to highlight your sketch. The lines that you make using the pencil will serve as guides for accurate and precise cutting and carving. Sketching will also help to avoid instances of miscalculations.
Carving needs high levels of accuracy as most of the mistakes that you make can be irreversible. Ensure that the stretch that you come up with is accurate and with no errors.
Firmly Secure the Workpiece
For easy and efficient clamping, you should firmly clamp your workpiece. This will help to ensure that it will be well-positioned and easy to work on. Clamping will also help to ensure that you clearly see and access all the corners of your workpiece.
Clamping will also help to avoid the workpiece from falling on the ground and breaking. Clamping will also help to ensure safe carving; the instances of the workpiece falling on your feet will be highly reduced.

Cut the Primary Shape
It is vital that you make the basic shape of the carving that you are making. This stage involves removing as much wood as you can. Continue cutting and chiseling until you visualize the primary shape of the final workpiece. Getting the primary shape is vital as it will help achieve and get the final design and shape you intend.
This stage can be tedious and time-consuming as it is much physical; all the extra wood pieces should be removed to ensure easy achieving of the final workpiece. To get the basic shape, you could opt to use the u-gouges to get rid of the excess material.
Make the Final Touches
After you achieve your desired shape and design of the carving, it is time to make the final touches and give your workpiece an elegant and classy look. It would be best if you devoted your time to work on the final details. You should use sharp razor blades to perfect the appearance of your workpiece.
You should then preserve the workpiece by applying a wood finish to it. This will help protect the surface of your workpiece from dirt, dust, oils, moisture, and other debris. Applying finish will also help to ensure that your workpiece is of high value and more appealing. Some of the finishes you could use on your workpiece include paste wax, polyurethane or urethane, or Danish oil.
How to Create Carving File
Creating elegant carvings can be challenging; however, the use of a CNC router has made it easier. The use of a CNC router has made it easy to create creative and elegant carvings, including door panels, frieze boards, box lids, awards, emblems, signs, artworks, and making corporate signatures on pieces of wood.
The use of a CNC router helps in the creation of outstanding carvings with a high level of precision. Creating a carving file can be challenging; however, it becomes much easier with the right skills and techniques.
To create a carving file using a CNS router, you are first required to create a digital image. You may come up with your own design and shape, or you could download one from the internet. For perfect and easy carving, you need to come up with the 3-dimensional image, and this process requires the use of specialized software. Some of the software that you may use to create 3D images for carving includes 3D Systems Geomagic, Vectric Aspire, and Rhino.
Ideally, if you have not mastered how to use software to create 3D sketches for CNC carvings, you could opt to use 3D clip art available online. You should then download the 3D sketch to your CAM program. The image can be resized in accordance with your desired size.
The CNC router is then to create the primary shape of your carving. First, a rough cut is made, and this includes removing the extra materials. A recognizable low-resolution sketch is created. The extra debris is also removed. The next step includes making the finishing cut. This is achieved by using a ball-nosed bit as it aids in creating precise and smooth cuts.
Most woodworkers and carvers prefer the use of a CNC router as it helps in the swift and easy creation of carvings with an outstanding level of detail. There are numerous carvings that you can create once you have developed the images and the sketches you want. CNC router carvings will give you outstanding performance with the right skills and knowledge and only a few bits.