The Ultimate Guide: How to Flatten Wide Slabs Without a 24-Inch Planer
For many woodworkers and local lumber millers, the 'live edge' trend presents a massive challenge: how do you flatten a 30-inch wide walnut slab when your thickness planer only handles 12 or 15 inches? Industrial-sized 24-inch or 36-inch planers are prohibitively expensive, often costing as much as a small car.
The good news is that you don't need a five-figure machine to get professional results. The secret lies in using router sleds. In this guide, we will explore the most efficient way to achieve a perfectly flat surface on oversized lumber using a router flattening sled.
Table of Contents
- Why Choose a Router Sled Over a Planer?
- How the Router Sled Method Works
- Product Spotlight: SpeTool Cratos S01001
- Step-by-Step Guide to Slab Flattening
- Expert Tips for a Mirror Finish
Why Choose a Router Sled Over a Planer?
Standard thickness planers are limited by their throat width. If your slab is wider than the machine, you're stuck. Furthermore, planers can actually accentuate a 'cup' or 'twist' in a board because the pressure rollers flatten the wood against the bed while it passes through, only for it to spring back to its warped shape afterward.
A router sled for flattening slabs works differently. By suspending the router above the workpiece on a fixed plane, you are milling the top surface relative to the workbench, ensuring a truly dead-flat result regardless of the wood's internal tension. For more on the physics of wood movement, see Wikipedia's guide on wood warping.
How the Router Sled Method Works
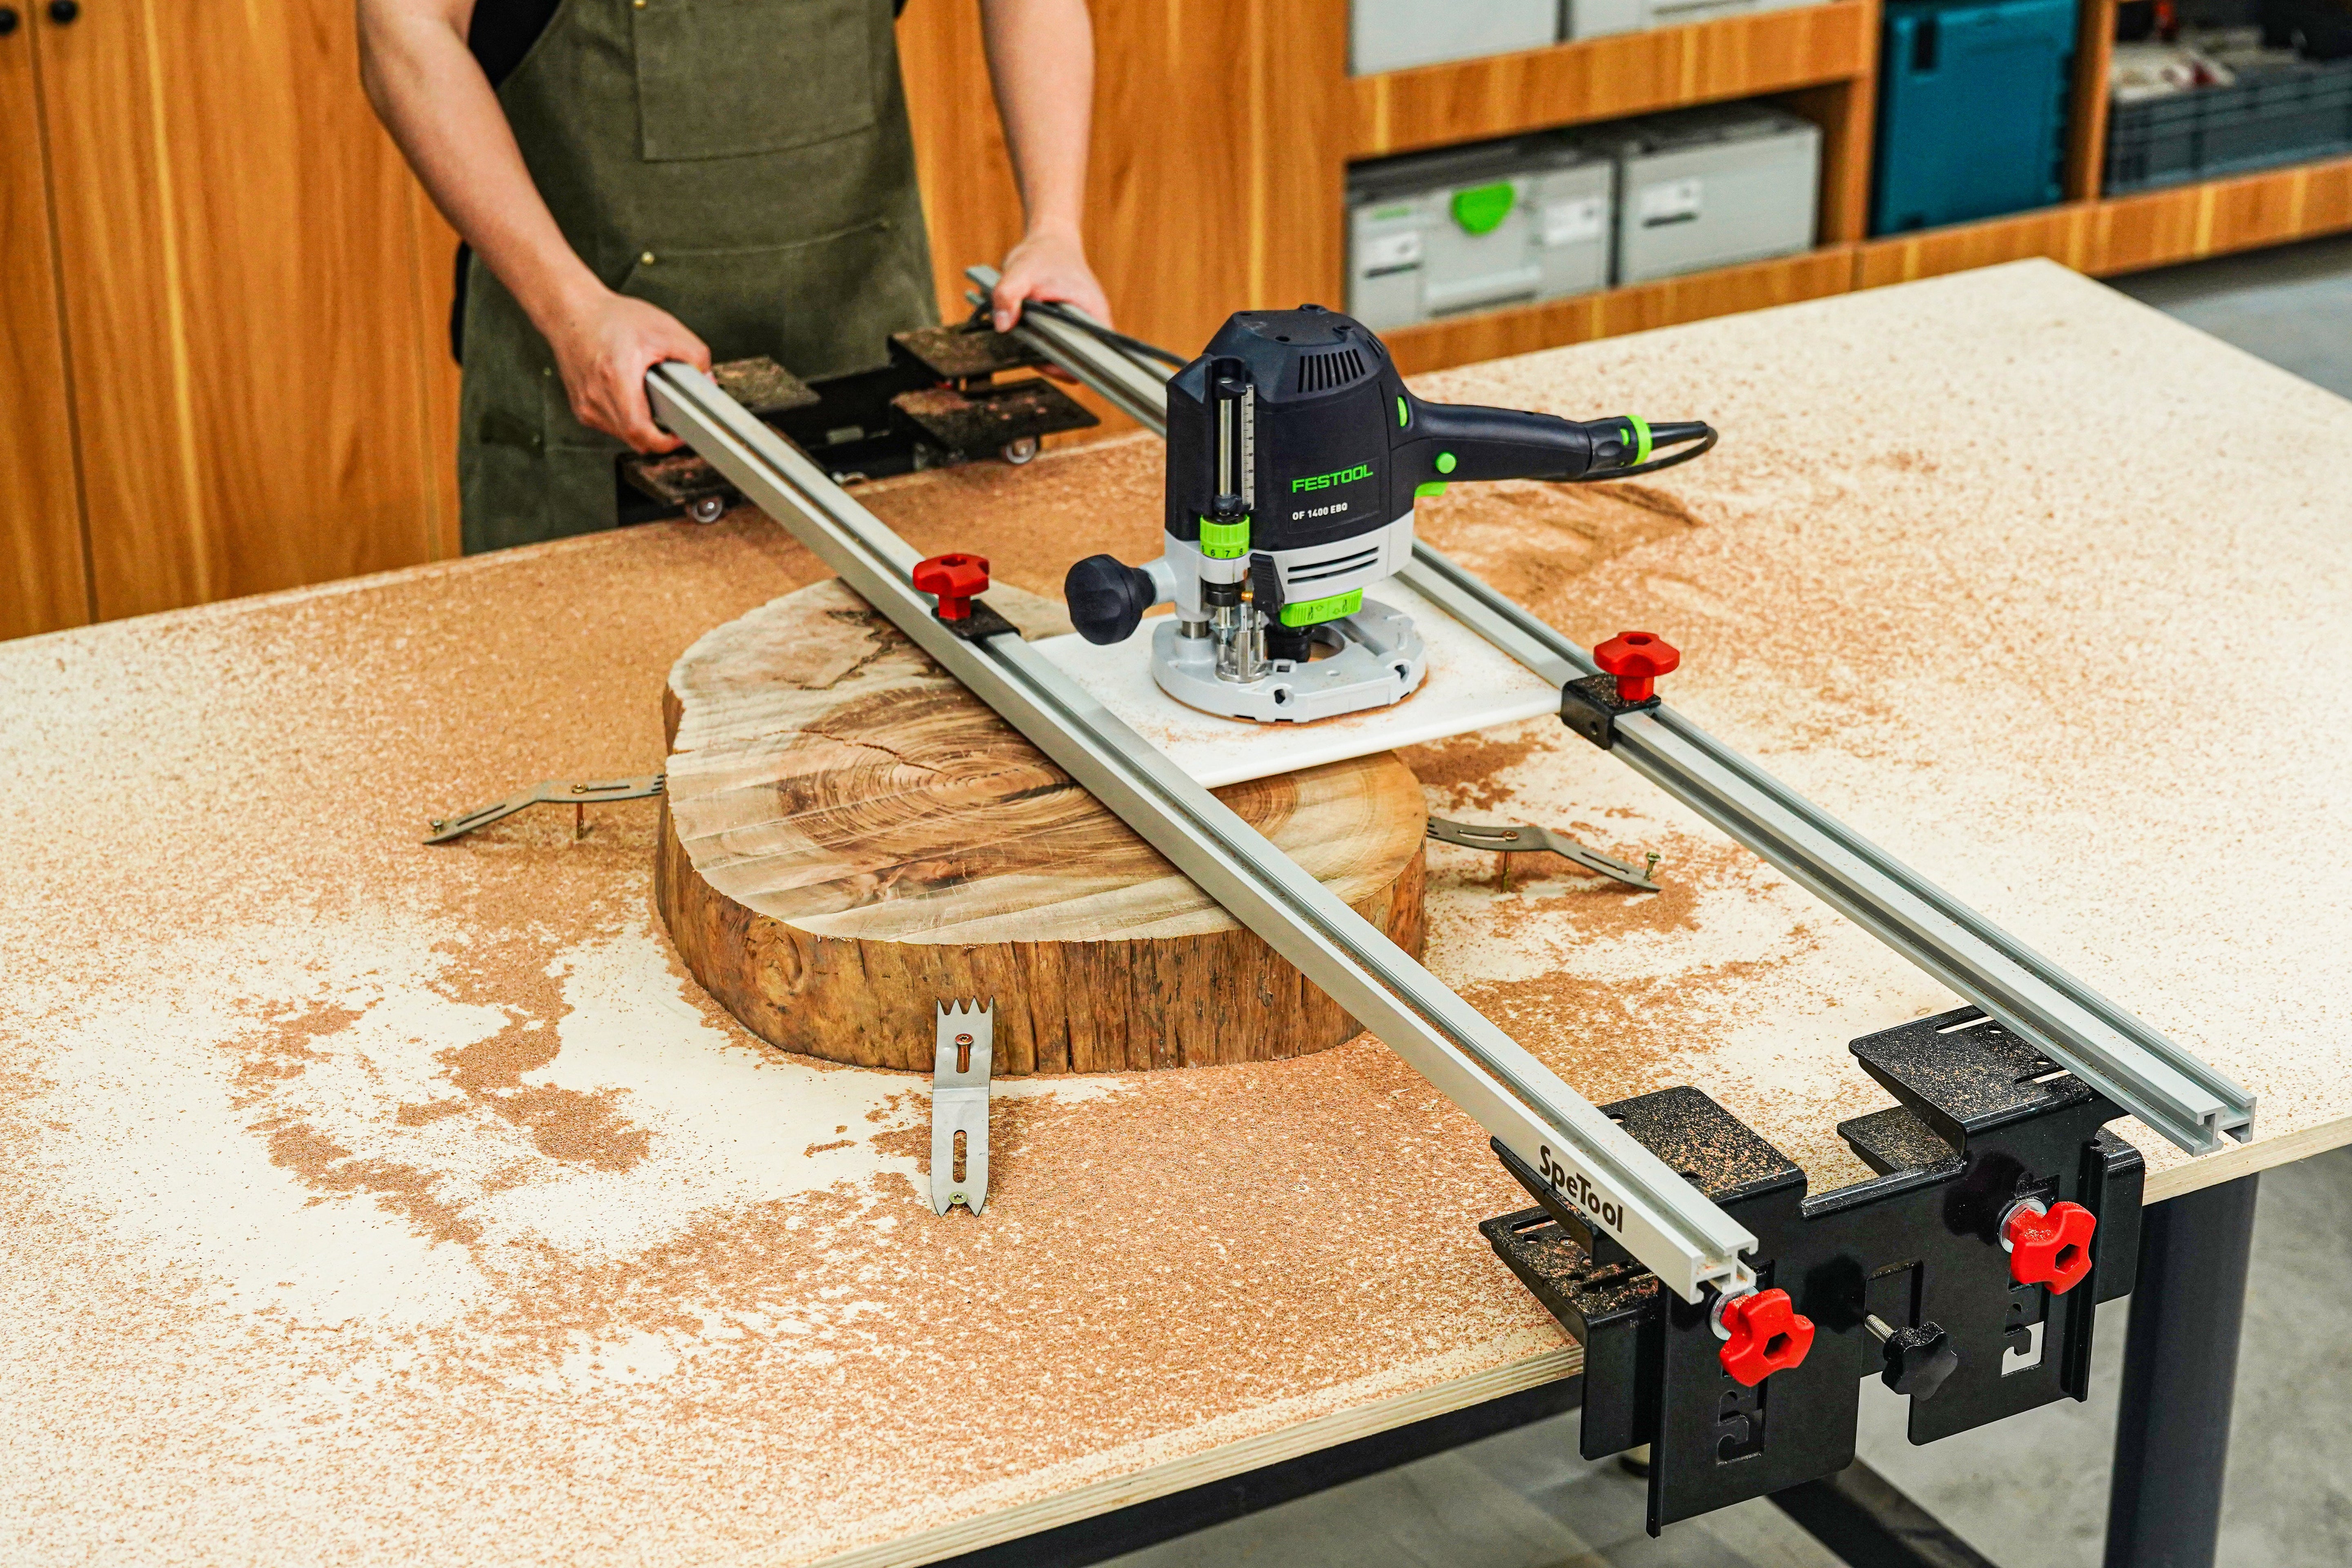
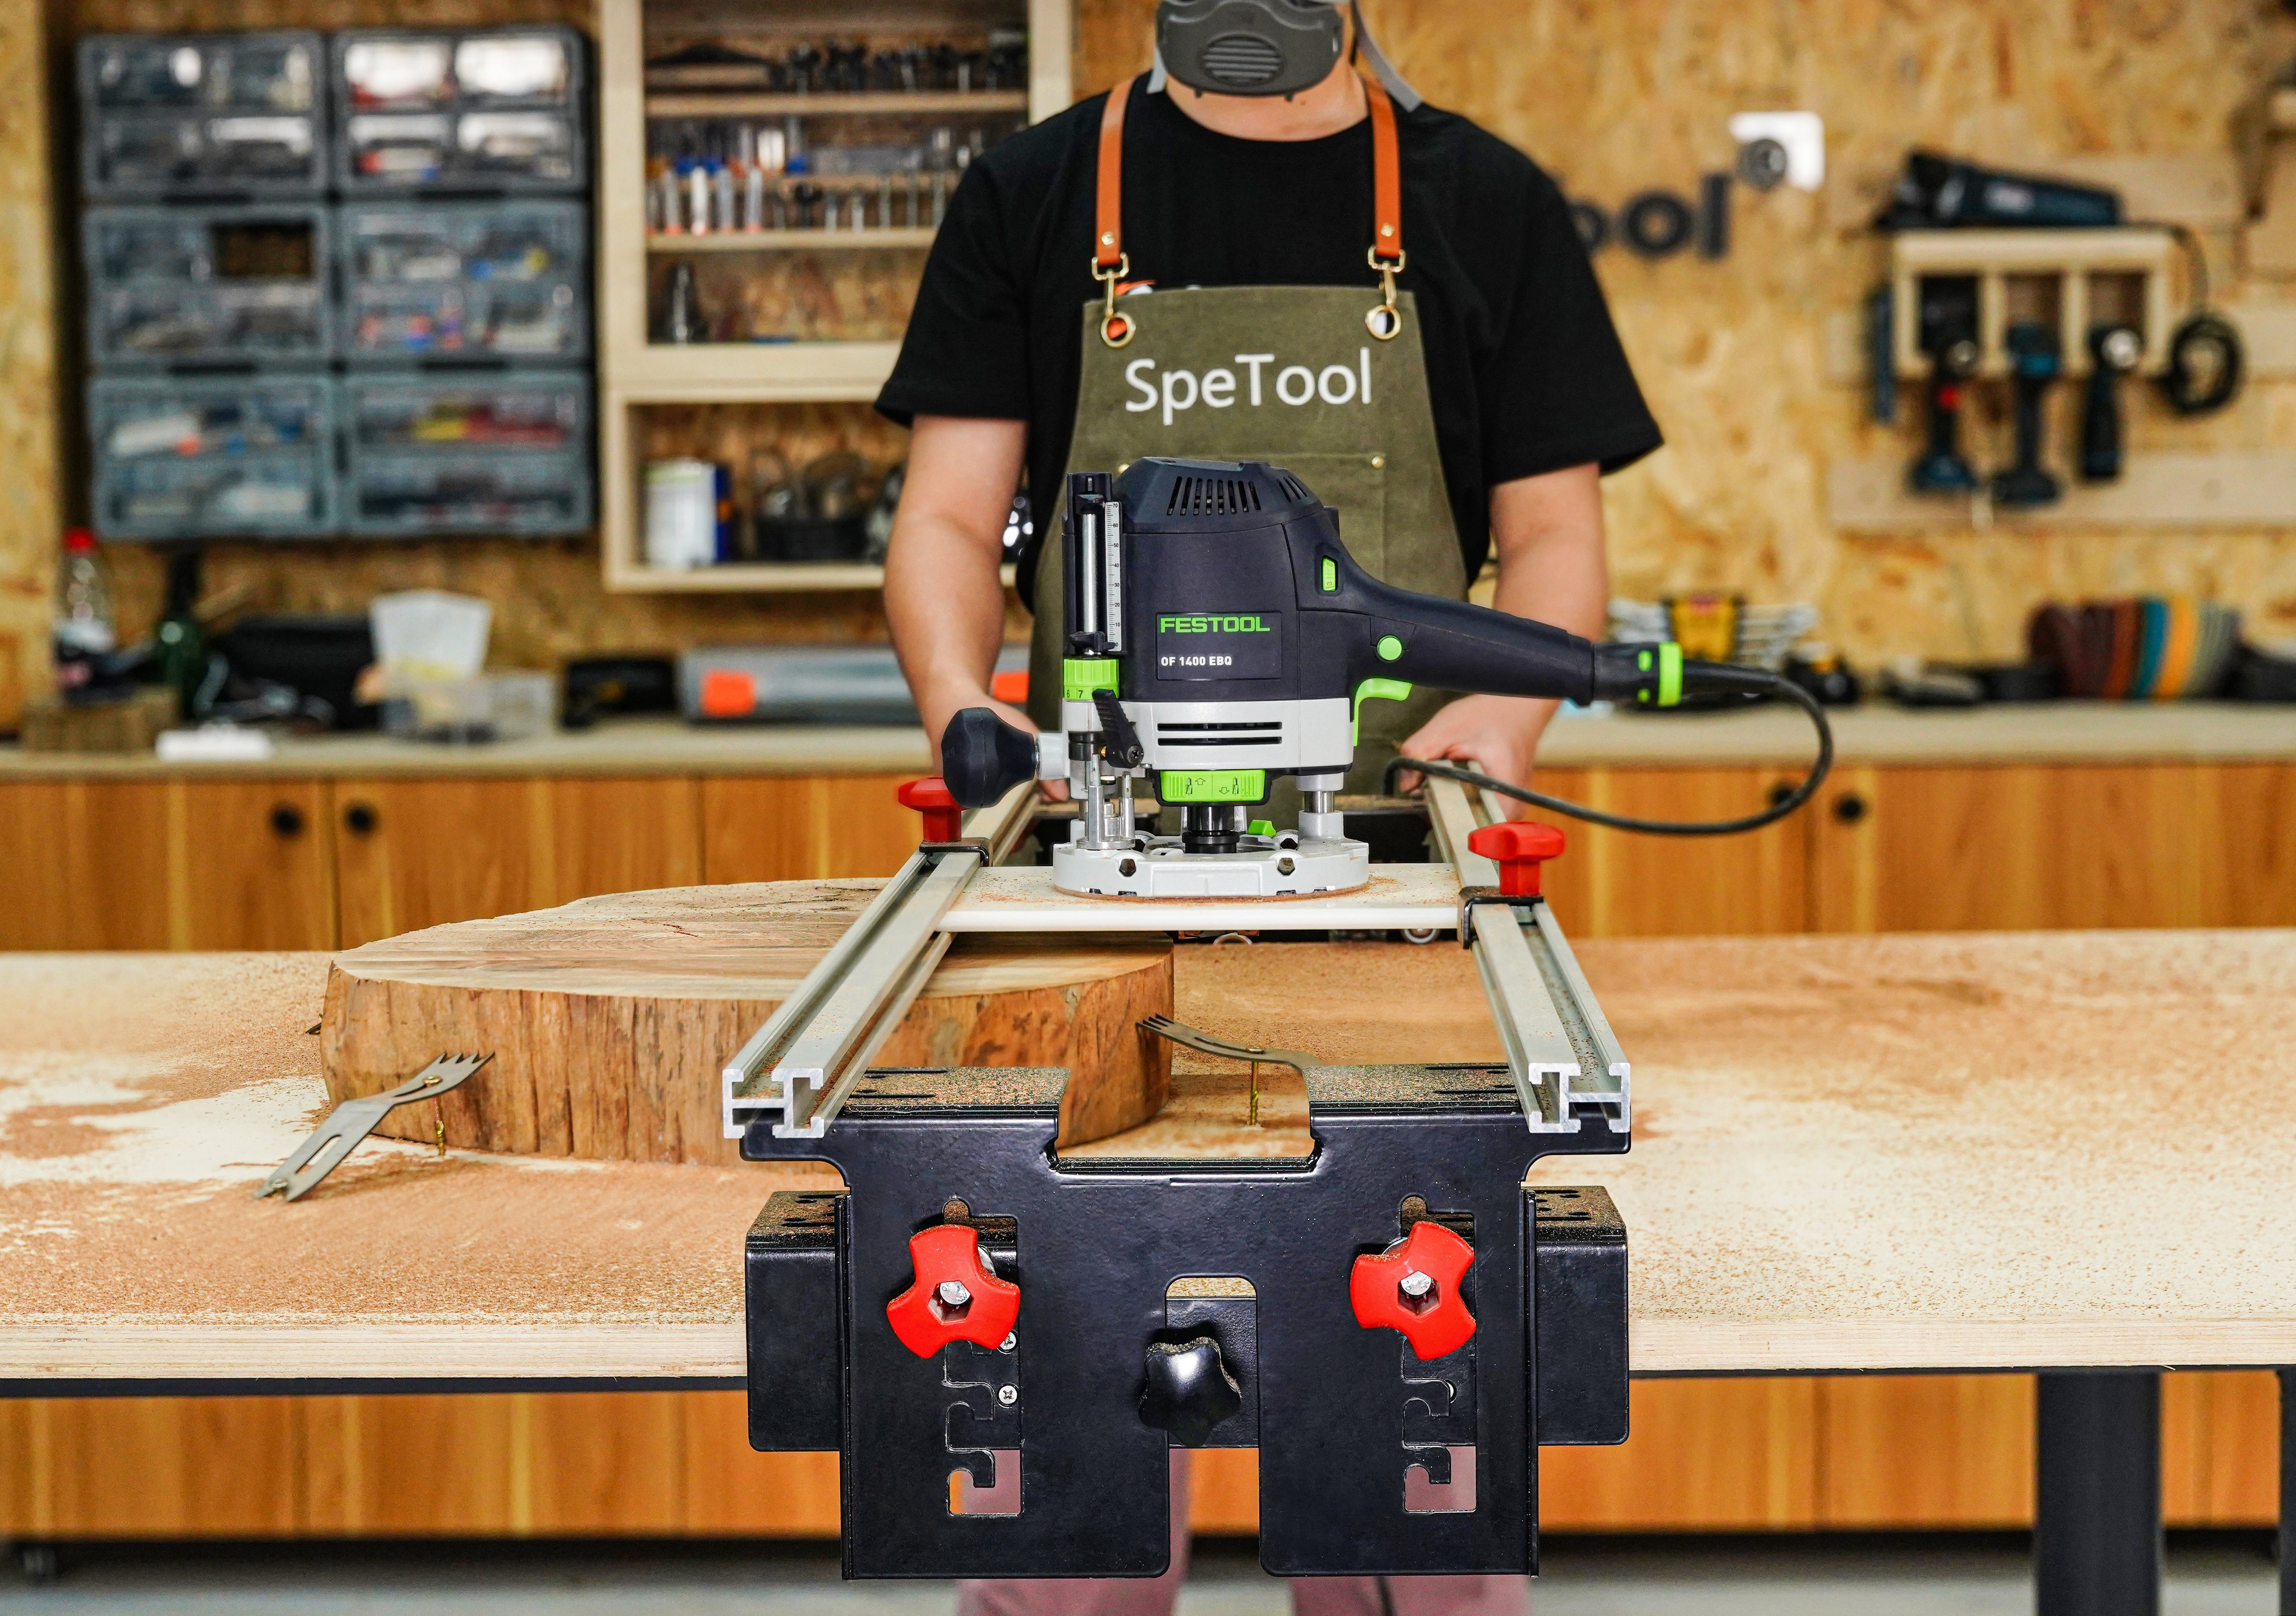
The concept is simple: you create a bridge that moves along two parallel rails. Your router sits in a carriage on that bridge, moving left to right. By systematically moving the router across the entire surface, you 'mow the lawn,' removing high spots until the slab is uniform.
Product Spotlight: SpeTool Cratos S01001 Router Sled
If you are looking for a professional-grade solution that won't break the bank, the SpeTool Cratos S01001 Router Sled is the gold standard for budget-conscious makers. Unlike DIY wooden sleds that can sag or bind, the Cratos is built for sturdy and precision performance.
- Industrial Build: The rails are made of 6061 high-strength anodized aluminum alloy. This ensures they never bend or warp, even under the weight of heavy 3-HP routers.
- Precise Height Adjustment: Featuring a unique base bracket + lift bracket system with 5 preset heights, you can 'click and go' without the tedious balancing required by other sleds.
- Universal Compatibility: It includes two router plates (one pre-drilled and one blank for DIY), ensuring it fits almost any router on the market.
- Dust Control: This sled can be paired with SpeTool’s dust collection system to capture 90% of wood chips, keeping your shop clean.
The Cratos S01001 also features an Easy Slide-In design, allowing you to mount your router via an opening breach in the brackets—no complex disassembly required. Check out SpeTool's full catalog for compatible flattening bits.
Step-by-Step Guide to Slab Flattening
1. Secure the Slab
Use the clamping tools included with the SpeTool Cratos to fix your wood plate to your workbench. Ensure the slab is shimmed so it doesn't rock during the process.
2. Set Your Depth
Find the lowest point of the slab. Set your router bit to just barely touch that point. The SpeTool Cratos features a laser pre-set position for the Z-axis, making it incredibly easy to adjust height without slippage.
3. The Milling Process
Turn on your router and move the router flattening sled across the width of the slab. Take light passes (about 1/8th inch deep). If your bit is too short to reach the wood, consider using a Router Collet Chuck Extension.
Expert Tips for a Mirror Finish
- Bit Selection: Use a high-quality surfacing bit with carbide inserts. This reduces sanding time significantly.
- Overlap Your Passes: Overlap each pass by about 30% to avoid 'ridges' between tracks.
- Grain Direction: While you often go across the grain with a sled, the final 'finishing pass' should be very shallow to minimize tear-out.
For more advanced techniques, visit Fine Woodworking to learn about grain orientation and finishing large surfaces.