
How to Use a Router Sled to Build an Epoxy Resin Touch-Sensitive LED Smart Table
Materials List:
Hardwood slab (recommended thickness: 30mm)
Epoxy resin (transparent or tinted)
Hot glue sticks
Clear coat (polyurethane or epoxy finish)
Furniture-grade wood glue
Table legs
Foam boards for alignment
Tools Required:
CNC router machine
Router sled (SpeTool Cratos recommended)
Router (with multiple bit types)
SpeTool router bits:
- Surfacing bit (W05003 or W05002)
- Down-cut spiral bit (W04004)
- Flush trim bit (W07020)
- Round-over bit
Orbital sander or sanding block
Hot glue gun
Drill & screws
Measuring tools (calipers, squares, ruler)
Full DIY Process
Step 1: CNC Carve the Hexagon Pattern
Use a CNC machine to carve out a honeycomb hexagonal pattern from the top surface of your wood slab.
-
File available: Download the CNC pattern
-
Tool: Up-cut spiral bit
-
Tips:
-
Ensure the board is at least 10–20 cm larger than the design.
-
If your board is slightly warped, put Side A facing up.
-
Recommended hexagon depth: 23mm.
-

Step 2: Deburr and Polish
Use sandpaper to smooth the edges of the hexagons and remove any burrs left from CNC routing.
Step 3: Pour Epoxy Resin into Hexagons
Mix and pour clear or colored epoxy resin into the hexagonal grooves. Use a heat gun to remove bubbles. Allow to cure for 24–72 hours based on resin type.

Step 4: Flatten the Board Using a Router Sled
Once the epoxy is fully cured, it's time to flatten both the top and bottom surfaces of your slab.
-
Bit: ATS-coated surfacing bit
-
Purpose: Ensure the entire board is flat and level, crucial for smooth assembly.

Step 5: Cut Grooves for LED Modules
Reposition the board on the CNC with Side A facing up. Using a down-cut bit, carve circular grooves to hold the LED modules.
-
Depth: 10mm
-
Slightly wider than the original hex edges to allow light diffusion
Step 6: Surface Sanding
Sand the entire board, especially epoxy regions, to remove scratches and prepare for clear coating.
Step 7: Trim Edges
Use a table saw or flush trim router bit (W07020 at 10,000 RPM) to cut excess wood and straighten edges.
Step 8: Prepare LED Modules
Unbox and test the touch-sensitive LED modules. Make sure all are working and can connect in parallel.
Step 9: Install LED Modules
Fit each module into the pre-carved grooves. Use hot glue to secure them.

Step 10: Assemble Base & Frame
Create a matching-sized wood frame that supports the LED connections. Reinforce the board with beams if necessary for stability.
Step 11: Edge Finishing
-
Use a flush trim bit to align all 4 edges.
-
Chamfer the top edges using a round-over bit for comfort and visual appeal.
Step 12: Apply Final Clear Coat
Spray or brush a clear coat over the entire surface. This enhances gloss, protects the epoxy, and makes the wood pop.
Step 13: Attach Table Legs
Use wood glue and screws to attach your pre-chosen table legs. Clamp and let it cure for extra strength.
Done!
You now have a fully functional, touch-sensitive LED epoxy resin smart table that not only looks stunning but also impresses everyone with interactive lighting.
Bonus Tips:
-
Use foam boards to mark X & Y axes for CNC alignment.
-
Test the home position before cutting to avoid the router bit going off-board.
-
For CNC: always use a up-cut bit for hexagons and a down-cut bit for LED recesses.
-
Let epoxy cure completely before flipping or surfacing.
-
Sand epoxy thoroughly before adding the clear coat.


Related Blog Topics:
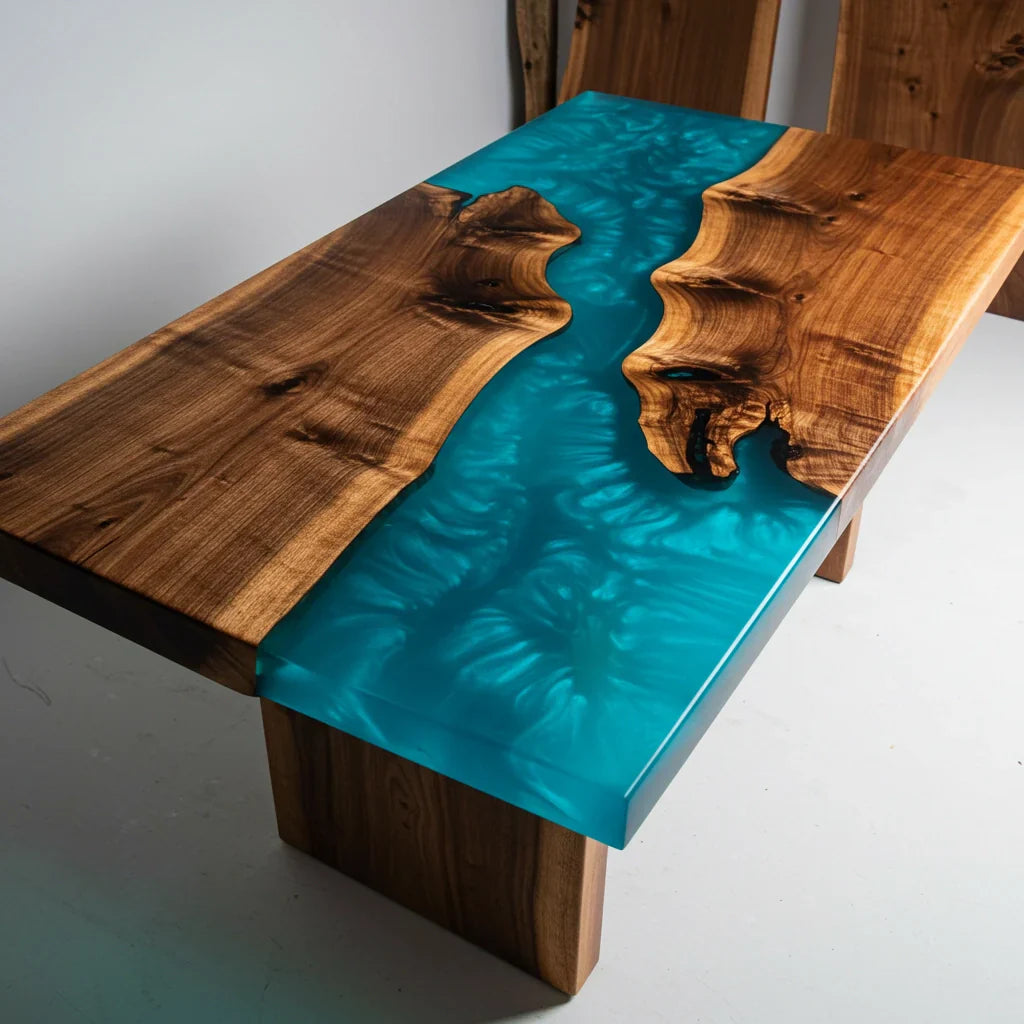
How to Build a River Table with a Router Sled
DIY vs. Buy: Should You Build Your Own Router Sled or Choose the SpeTool Cratos S01001?